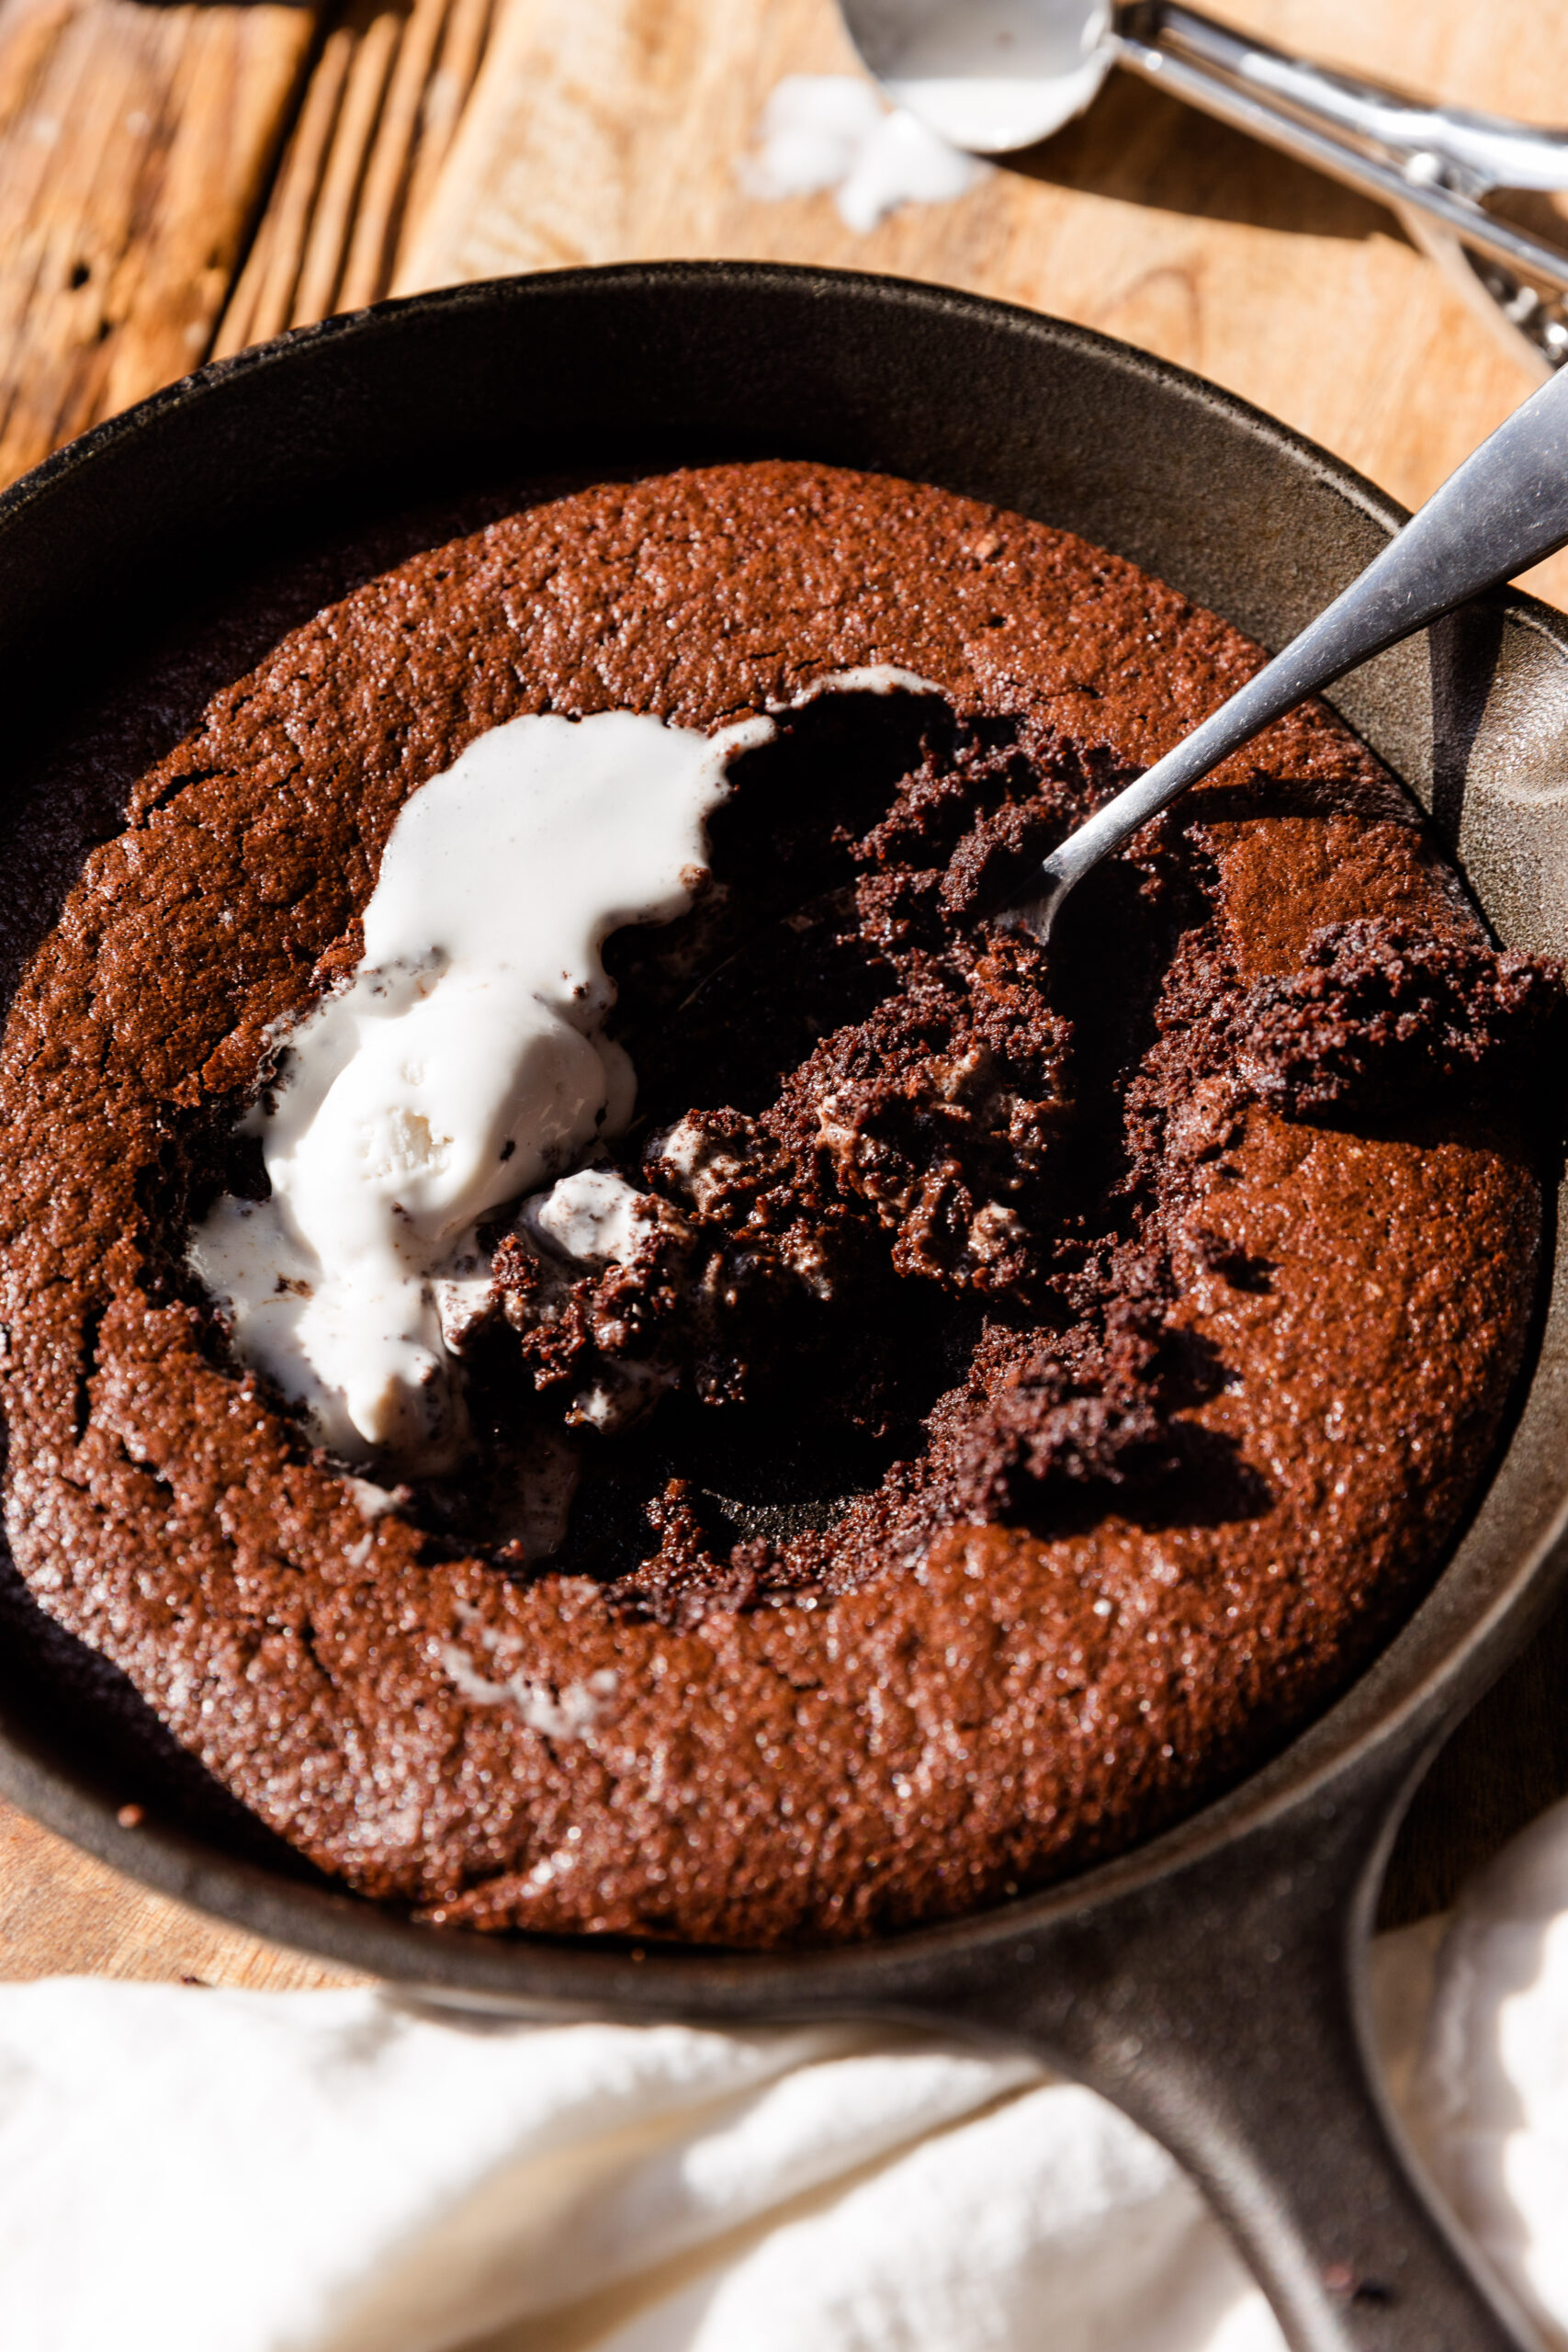
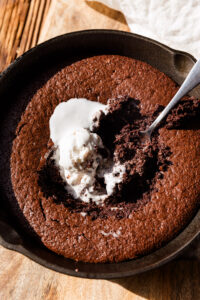
This Healthy Gluten Free Brownie Skillet is soft and gooey in the center with crispy edges. It's perfect for sharing with loved ones and only takes a few minutes to make!
Jump to:
Disclaimer: Some of the links in this post are affiliate links, which means I make a small commission if you choose to purchase through qualifying links.
Why You'll Love This Recipe
- Made with simple, wholesome ingredients.
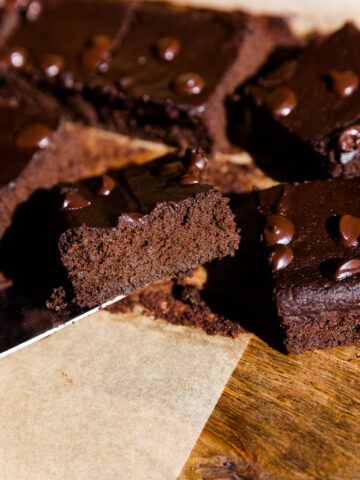
- Gooey center with crispy edges.
- Easy to make - great for a beginner baker.
- Great for anyone who is gluten-free or dairy-free!
🍴Ingredient Notes
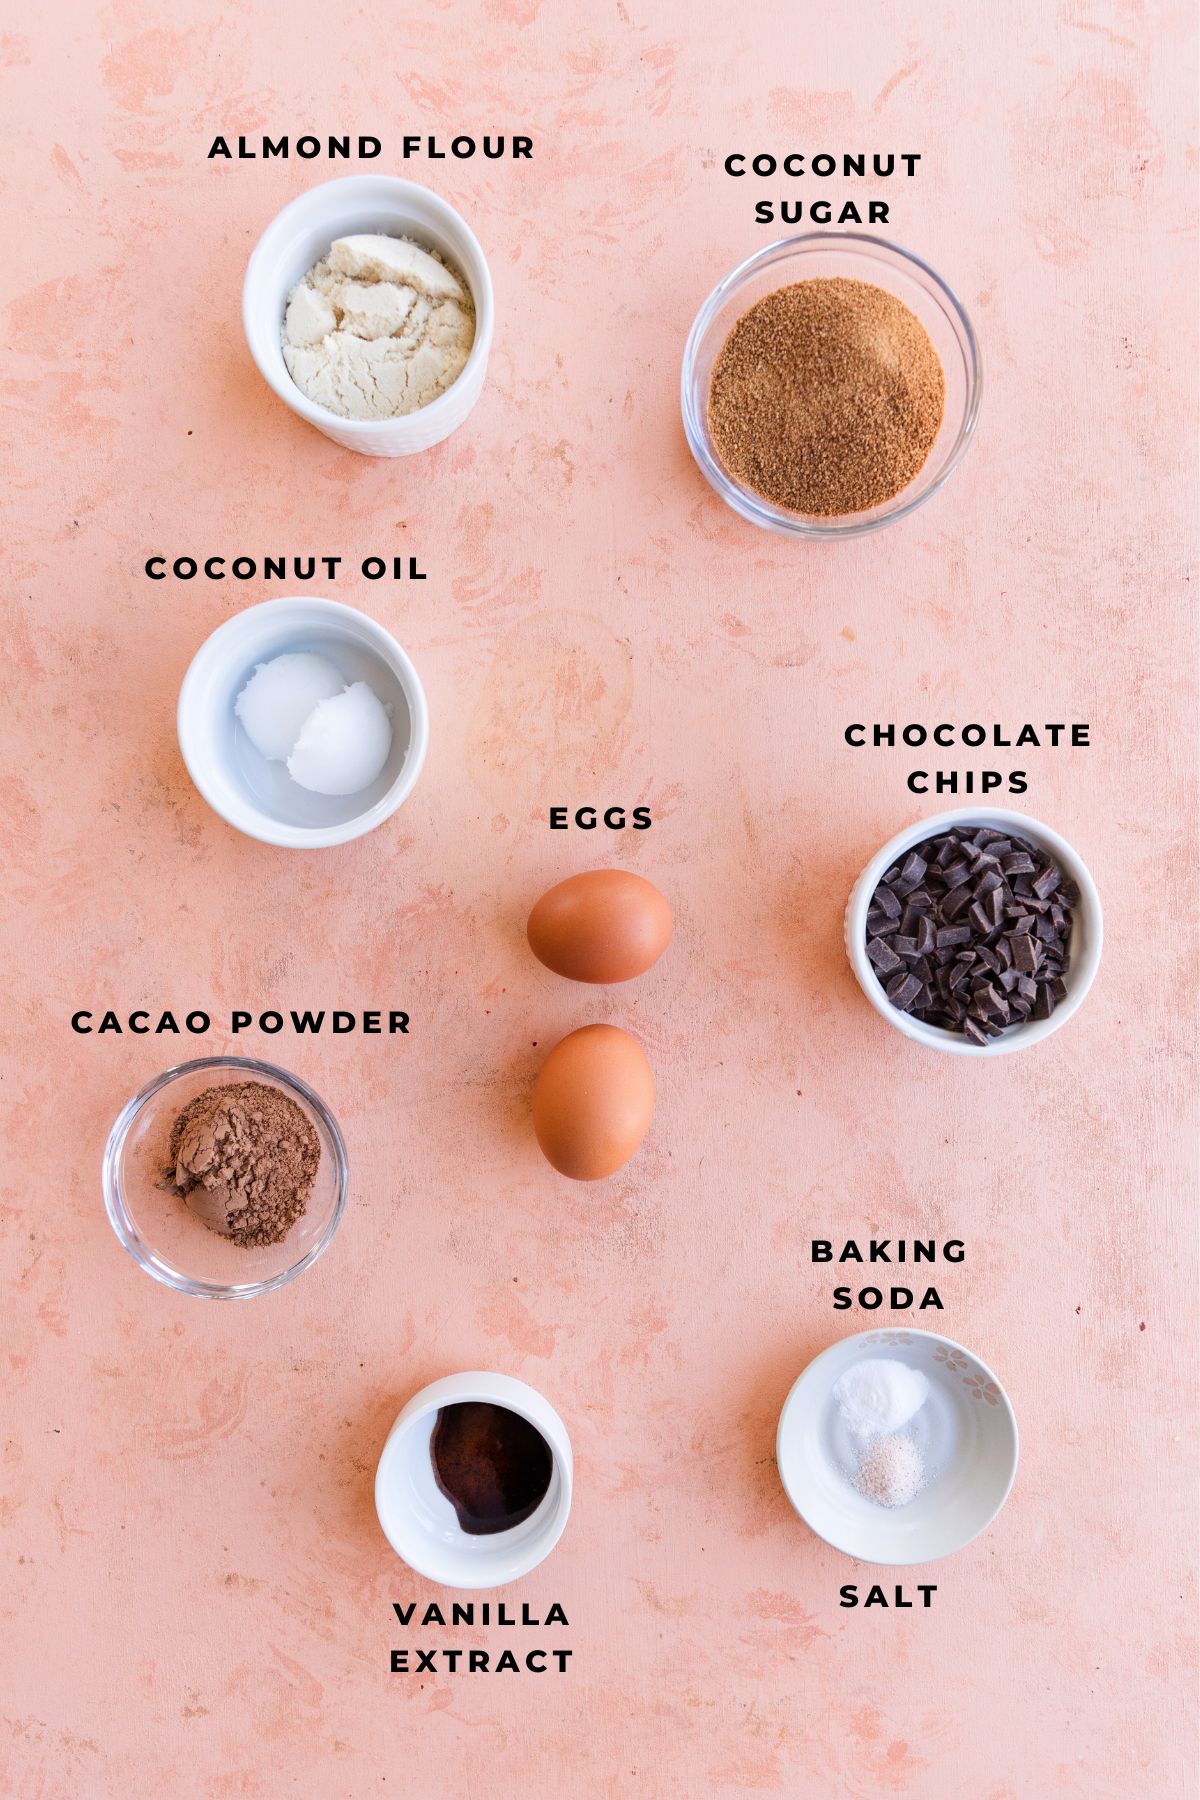
- Dark Chocolate Chips - If you prefer sweeter brownies, try swapping for milk chocolate chips.
- Eggs - Make sure they're room temperature!
- Coconut Sugar - You can substitute with Lakanto Golden Monkfruit or any granulated sugar.
- Coconut Oil- Make sure the coconut oil is measured first, and then melted.
- Almond Flour - Do not swap for any other flour.
- Cacao Powder - You can use traditional cocoa powder, but I like cacao powder because it’s less processed.
- Vanilla Extract - To balance out the rich chocolate flavor, you'll need to add in a little vanilla extract or vanilla paste.
- Baking Soda & Salt
🍴Step by Step Instructions
Step 1: Mix Dry Ingredients
Start by adding almond flour, cacao powder, baking soda, and salt into a small mixing bowl. Use a whisk or fork to blend until fully combined.
Step 2: Melt Chocolate
Add the chocolate chips with coconut oil into a small bowl and heat in the microwave in 15-20 second increments. (Stir well in between heating.)
Step 3: Blend Eggs & Sugar
Next, add eggs and coconut sugar into a separate mixing bowl. Whip with a hand mixer for 2-3 minutes. I love this Zwilling Cordless hand mixer!
Step 4: Blend Wet Ingredients
Once the chocolate mixture has cooled a bit, pour into the whipped egg mixture. Make sure to use a spatula to scrape out all of the chocolate.
Mix together with a whisk or hand mixer.
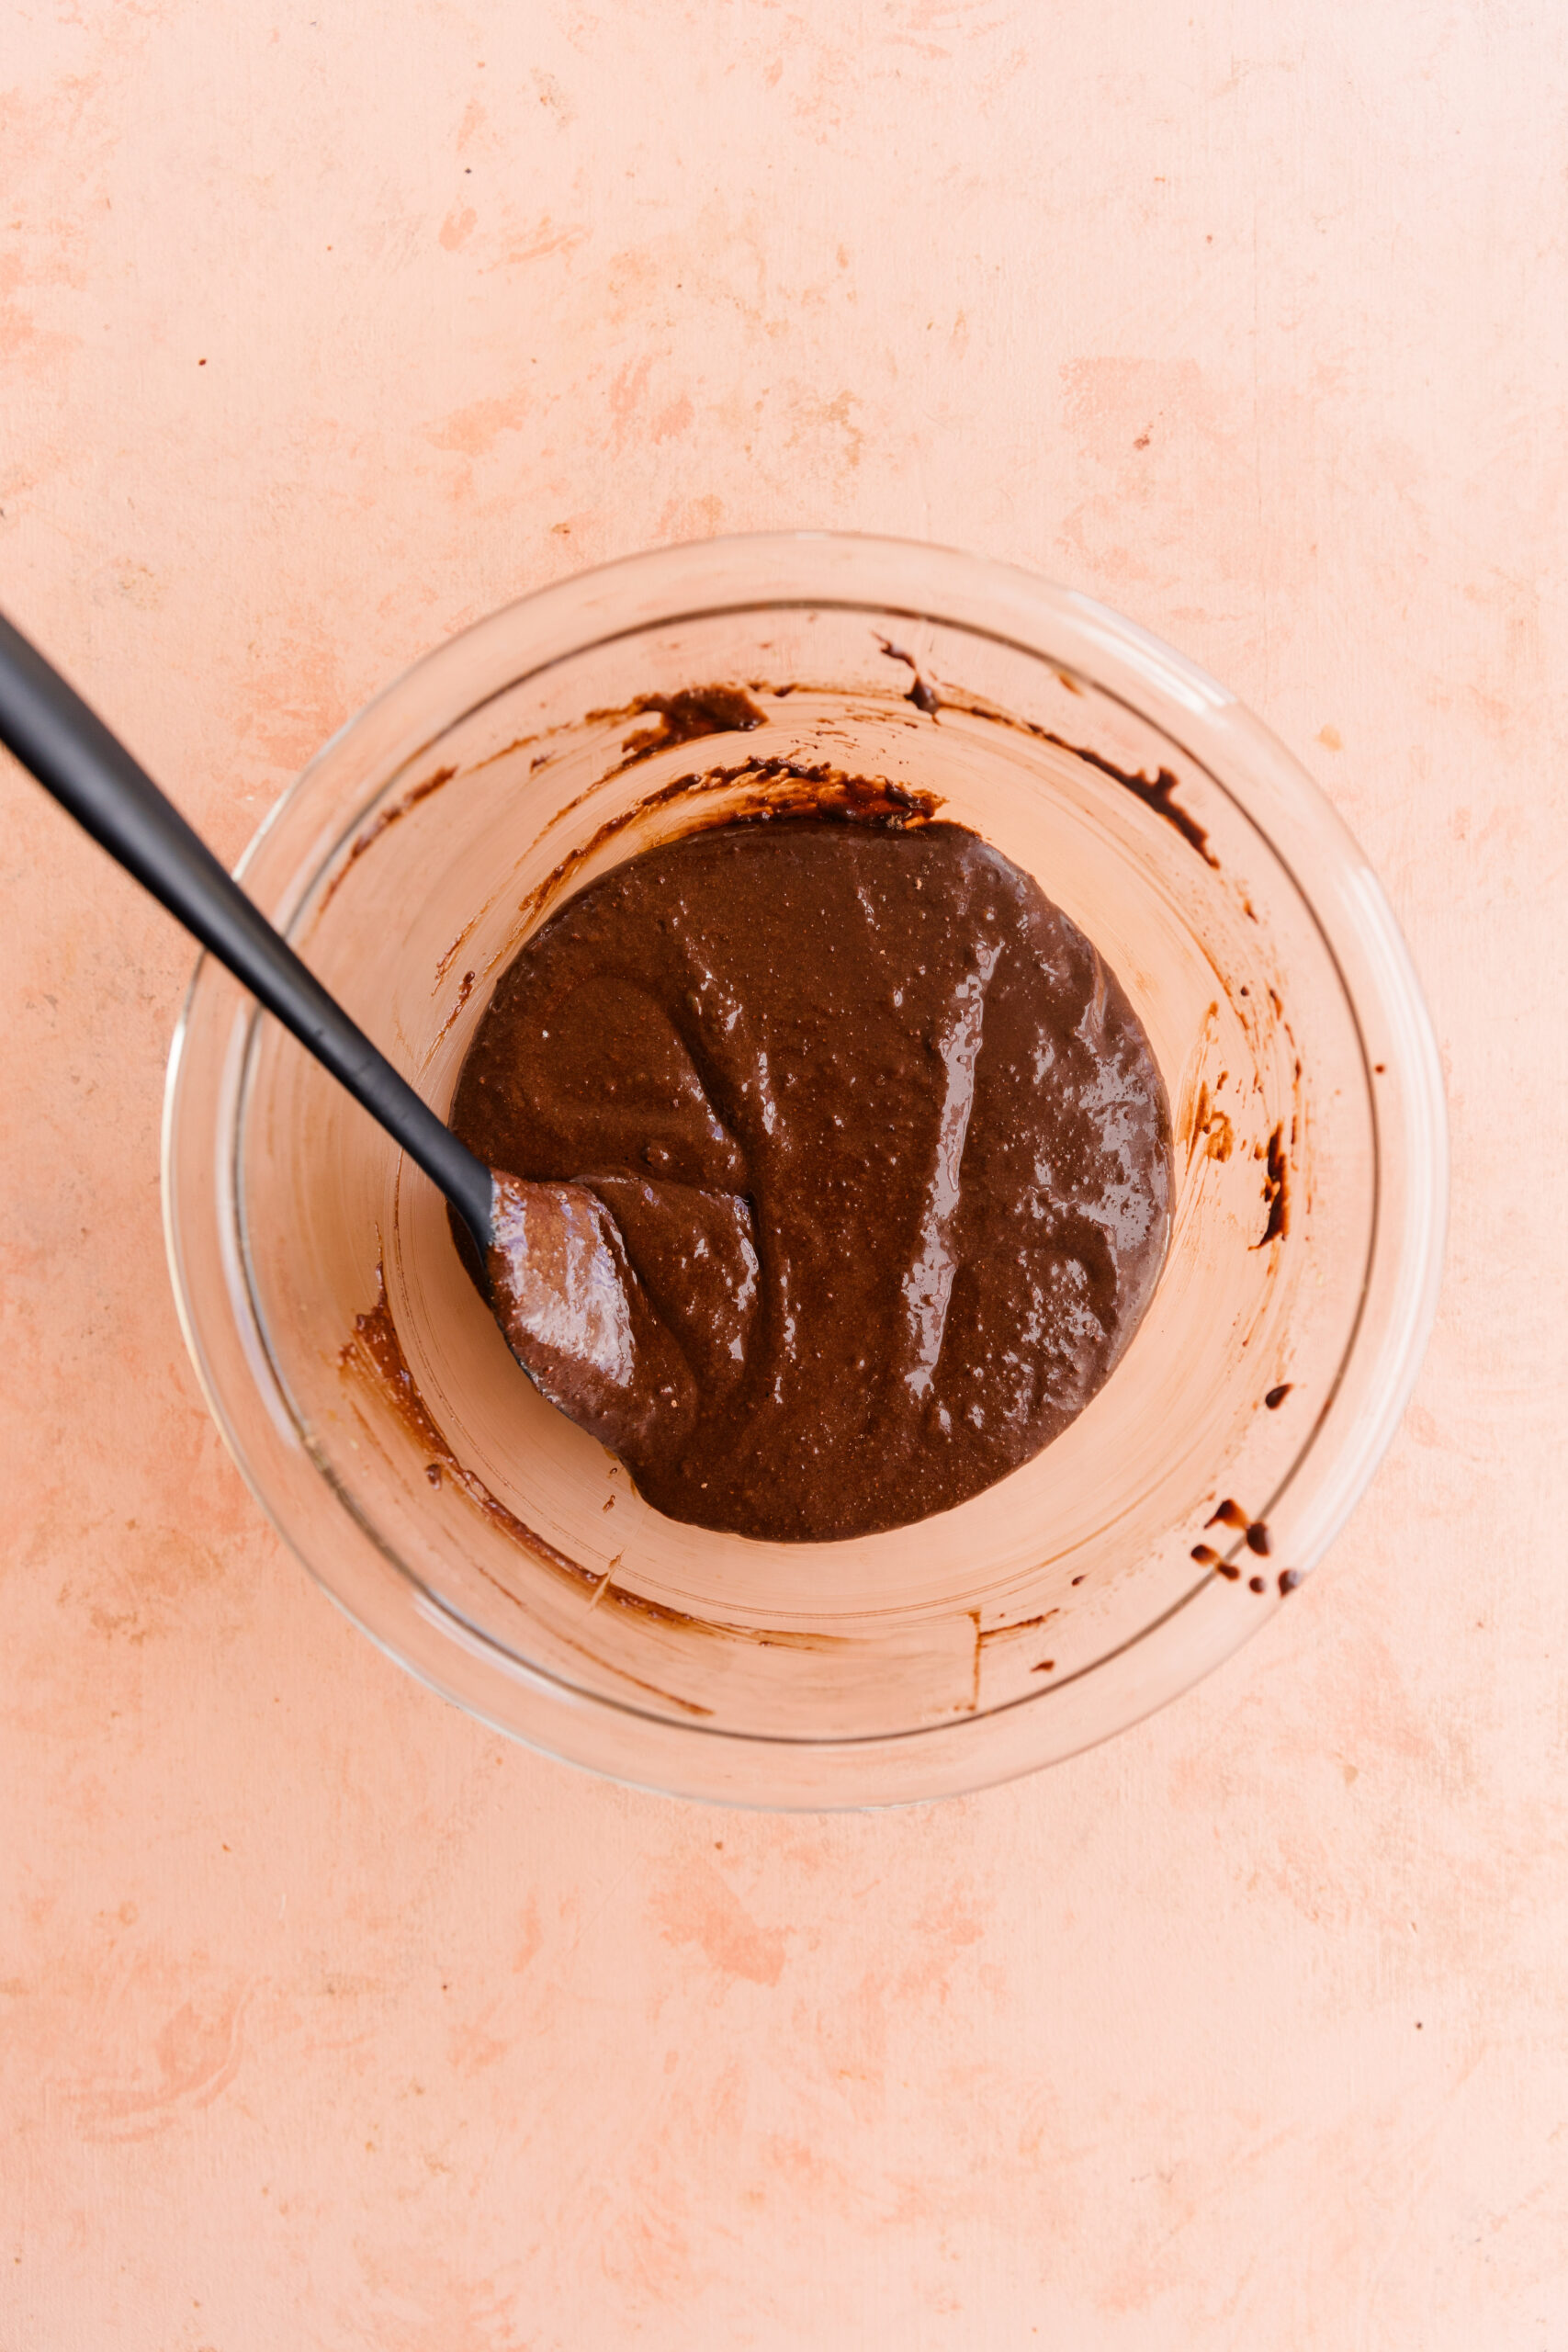
Step 5: Combine Wet & Dry Ingredients
Finally, pour the dry ingredients into the wet ingredients. Use a hand mixer or spatula to combine.
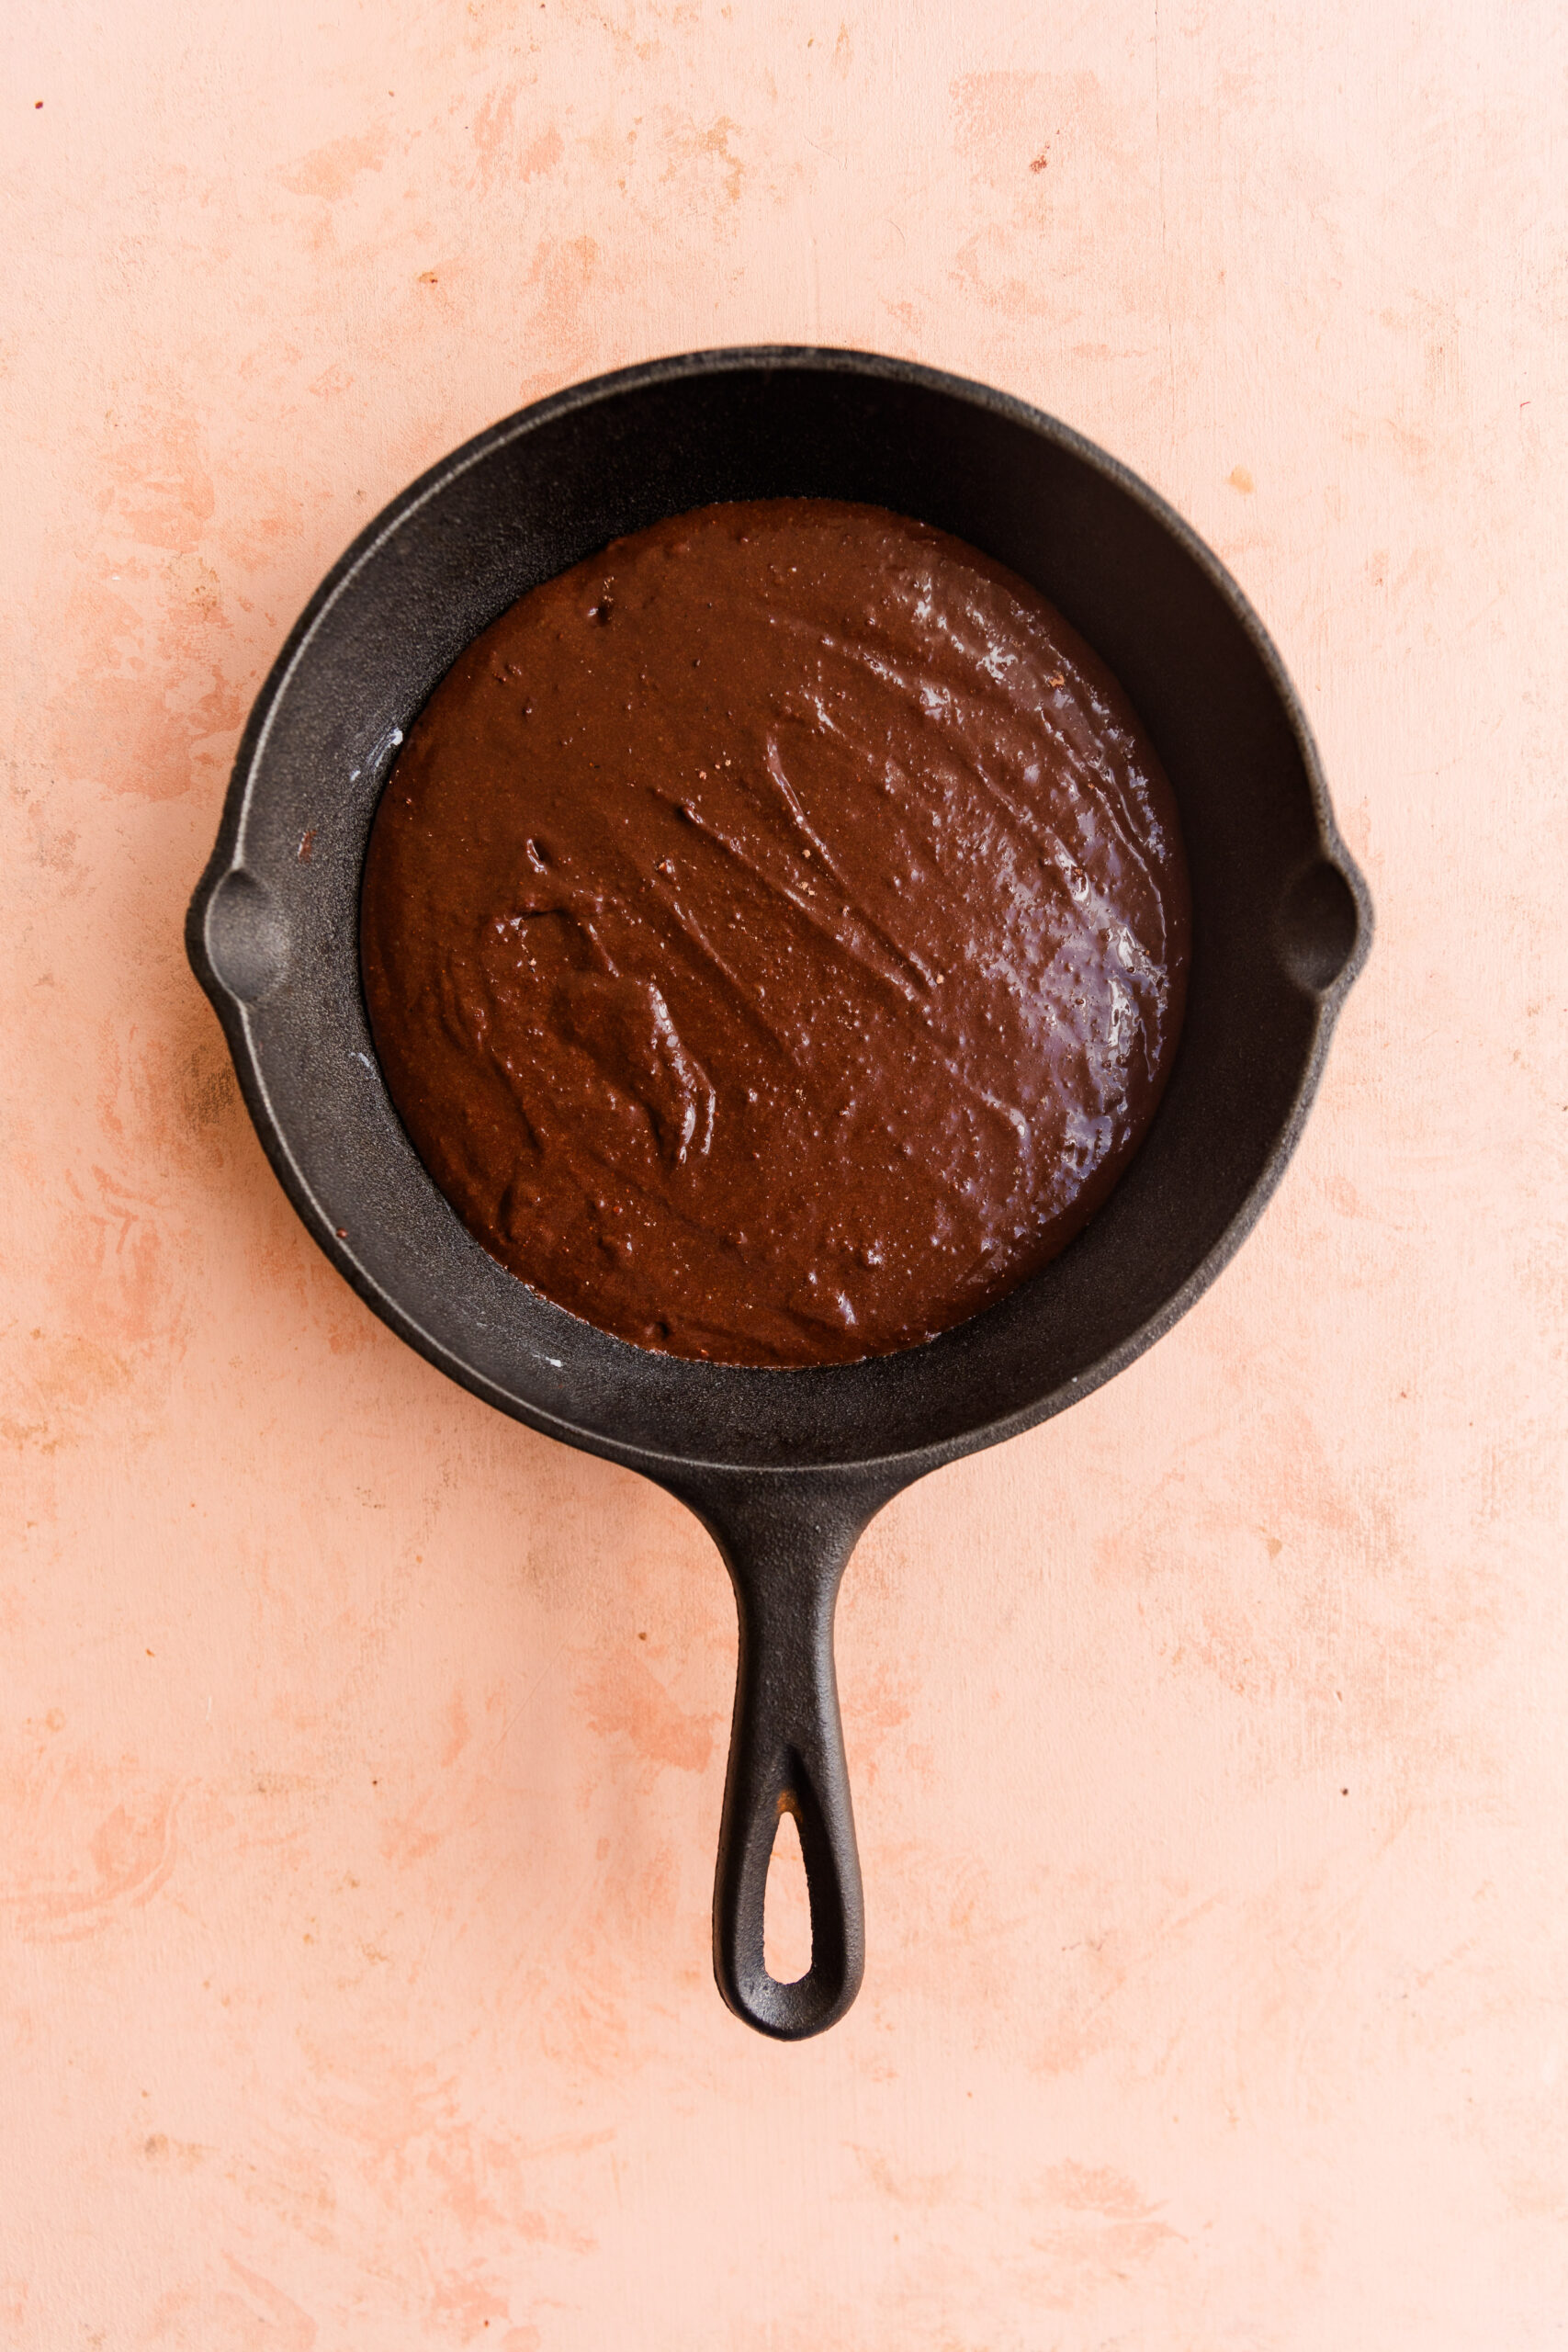
Step 6: Prepare to Bake
Add the brownie batter into your greased 8" cast iron skillet. This Staub Enameled Cast Iron Fry Pan works perfectly! Use the back of a spoon or spatula to spread it out evenly.
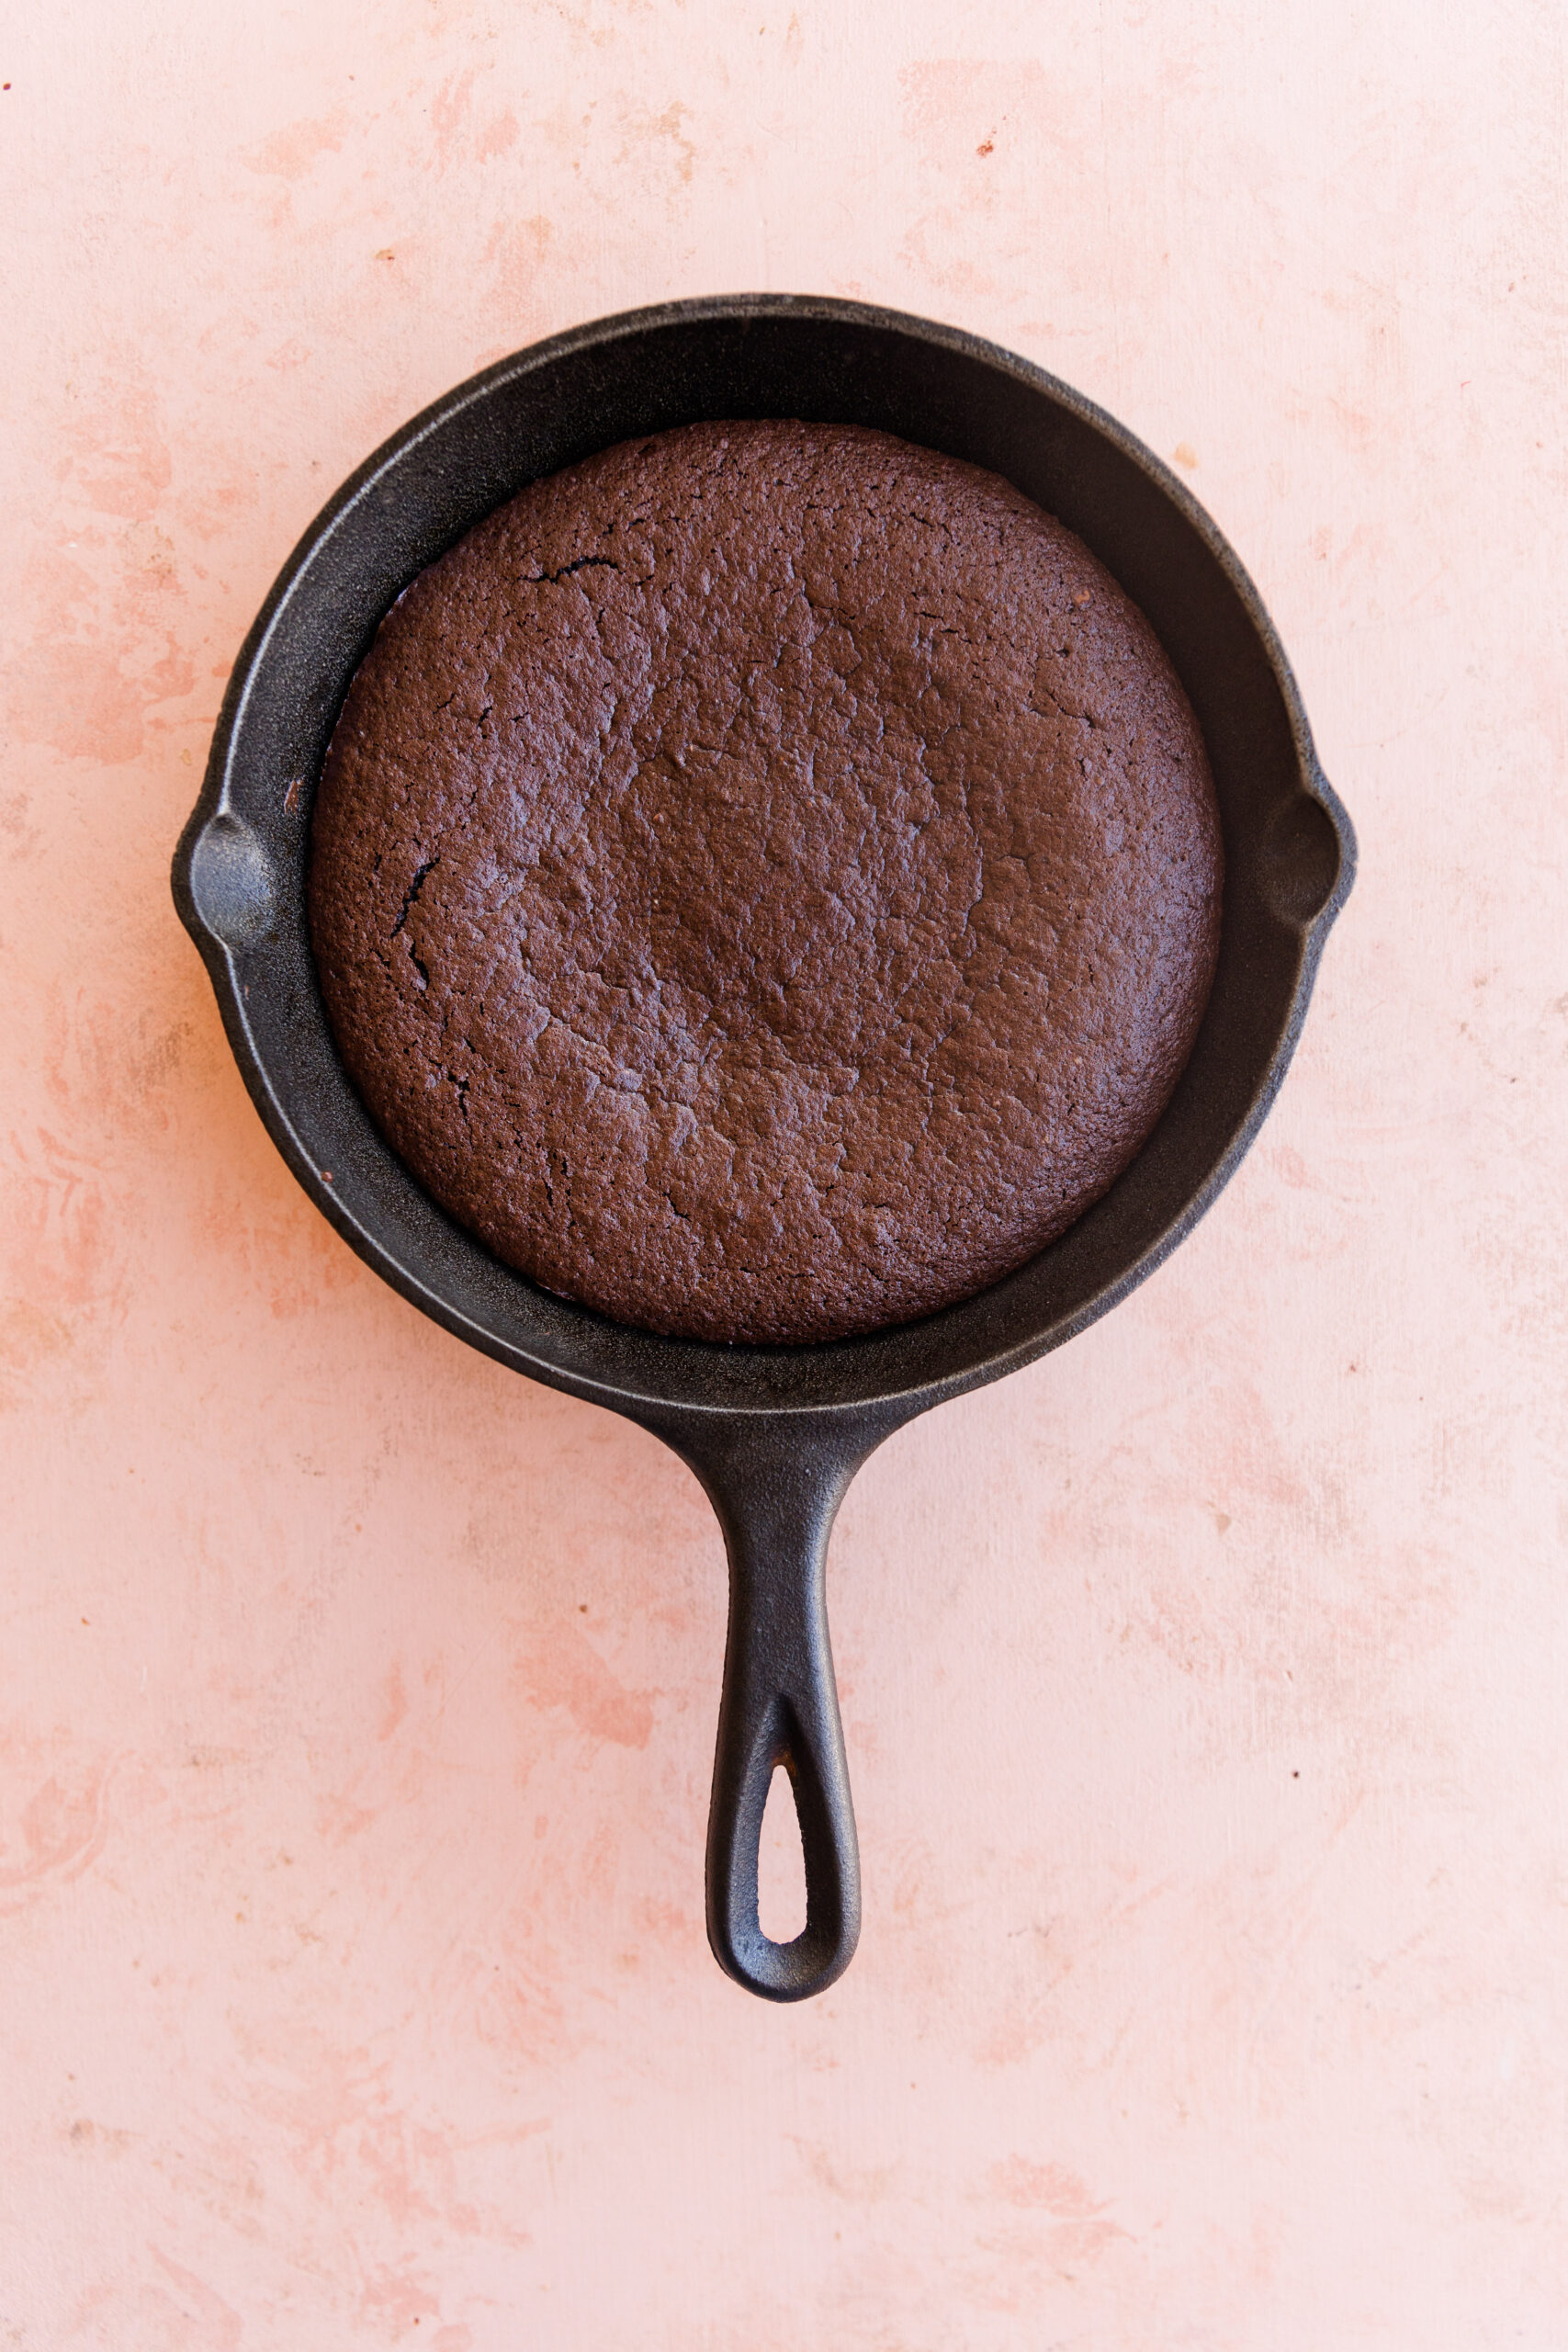
Step 7: Baking
Bake at 350 degrees for 14-15 minutes. The less you bake the softer the center will be!
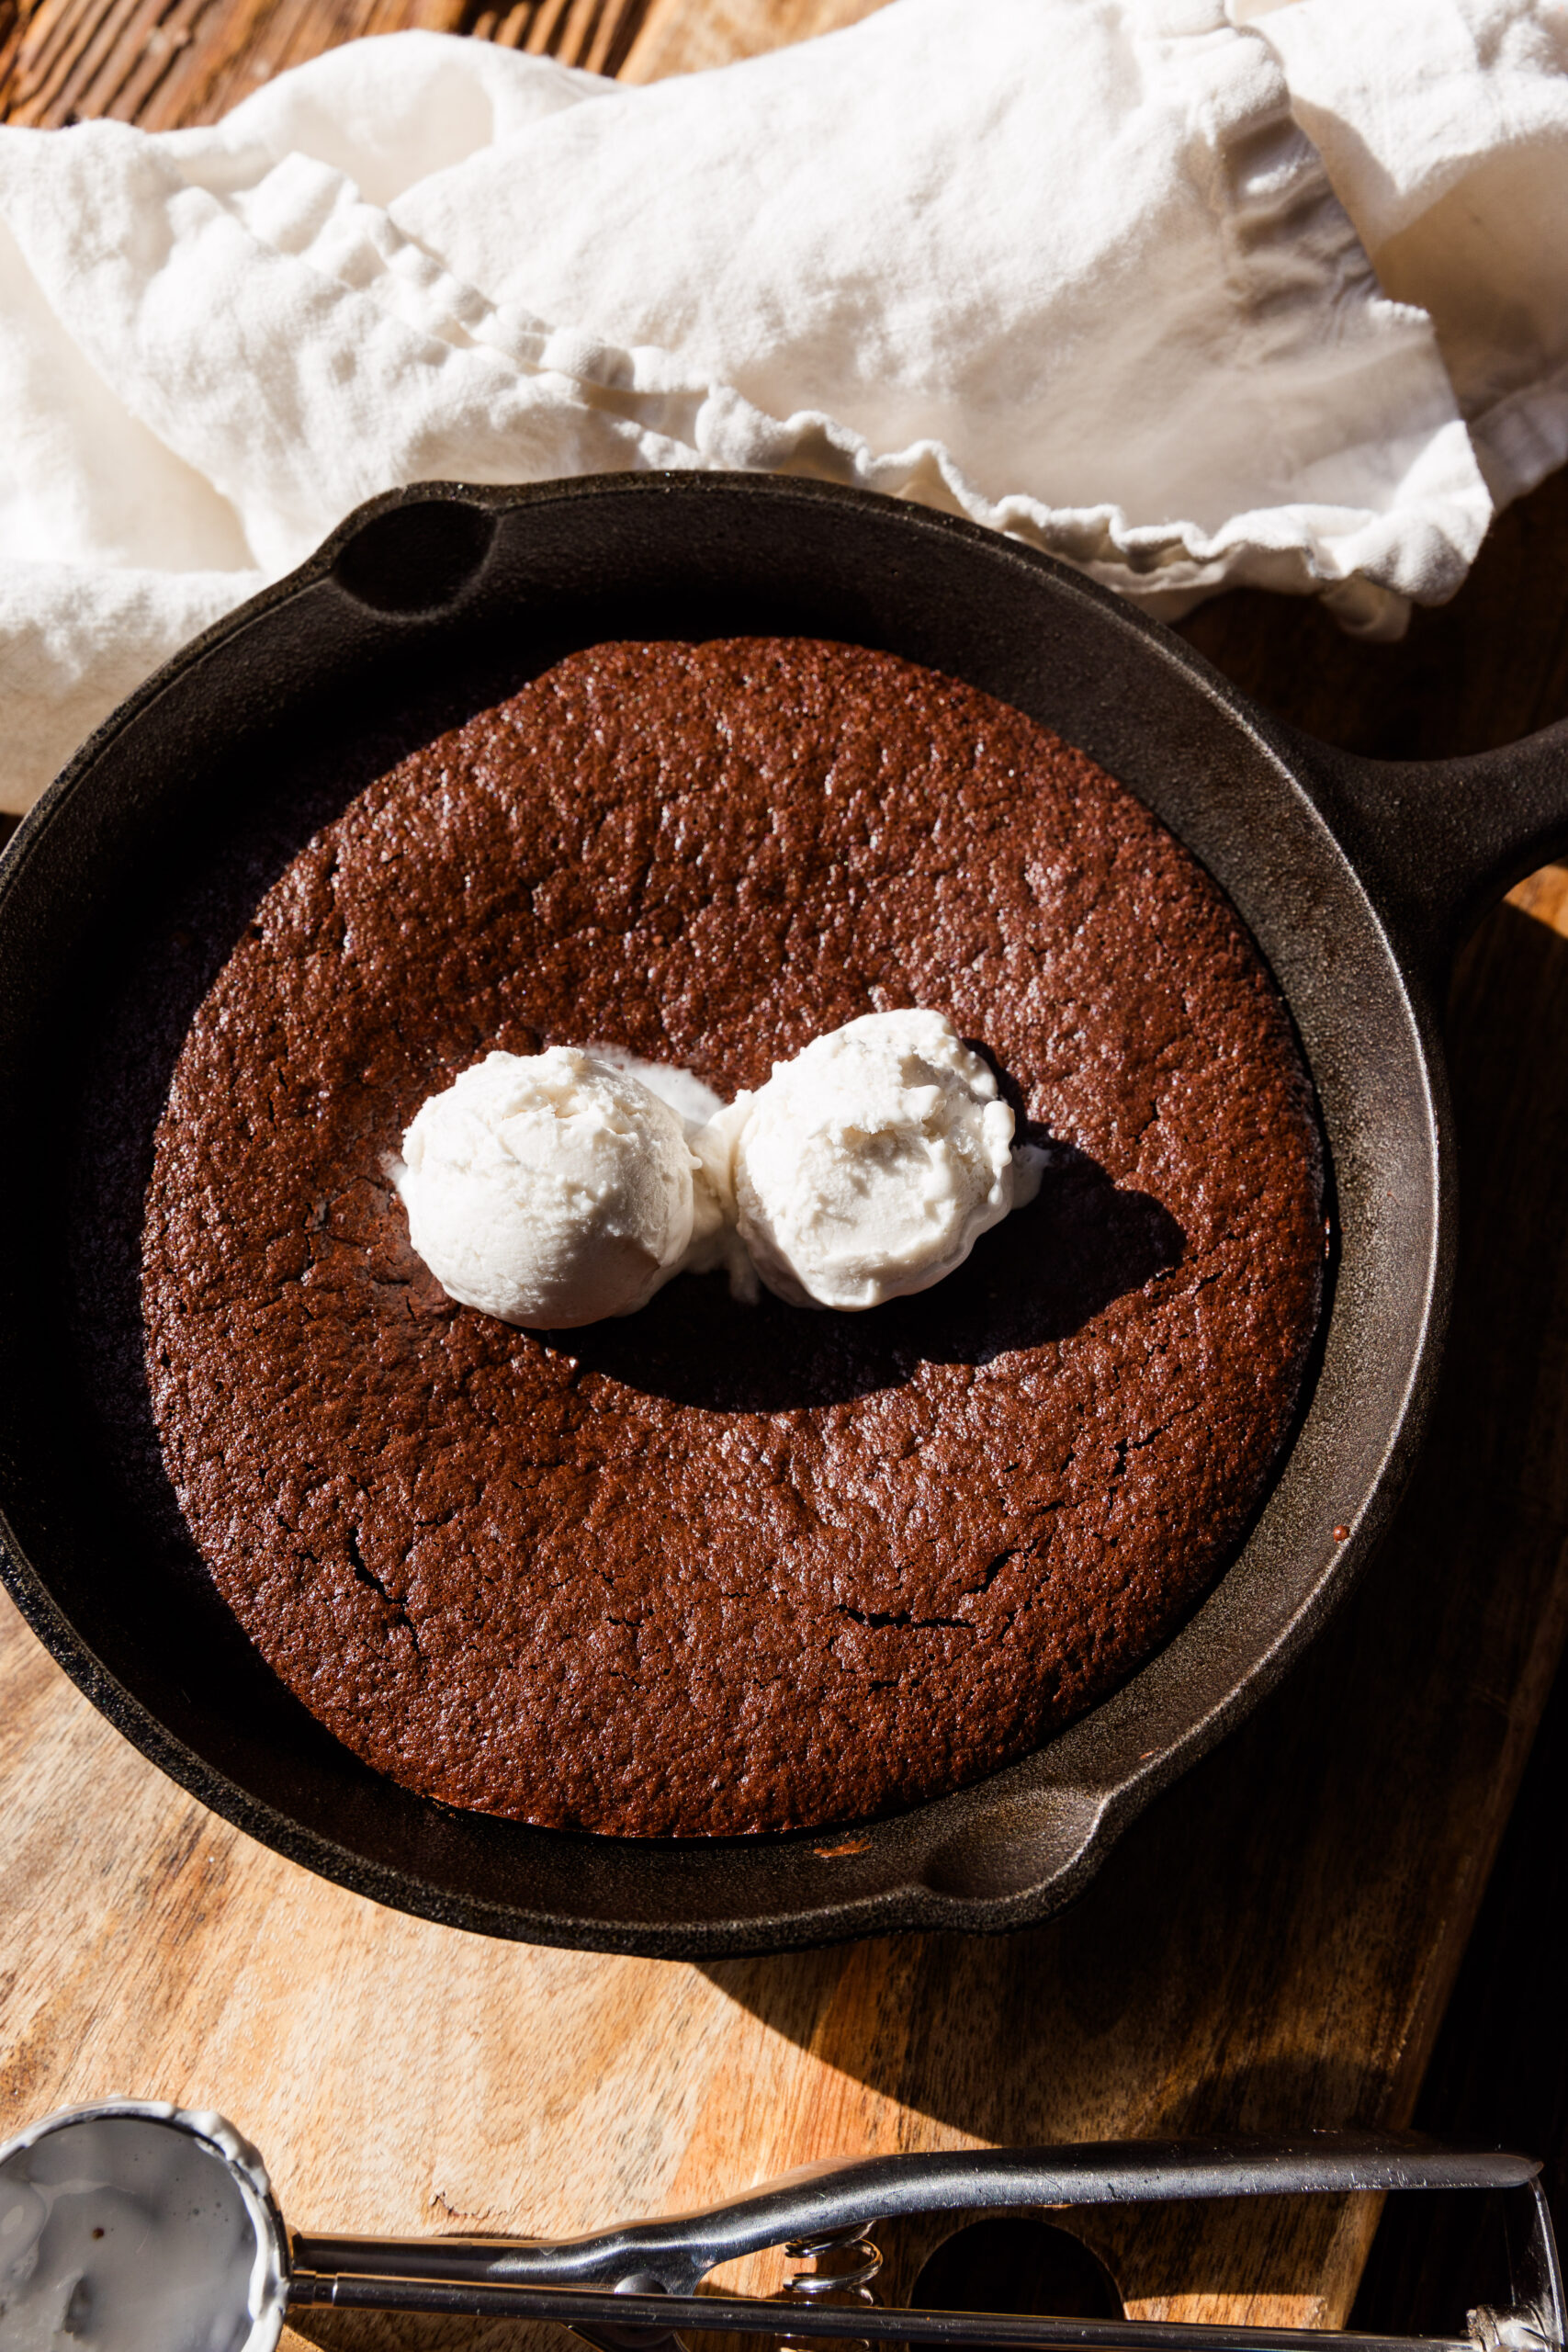
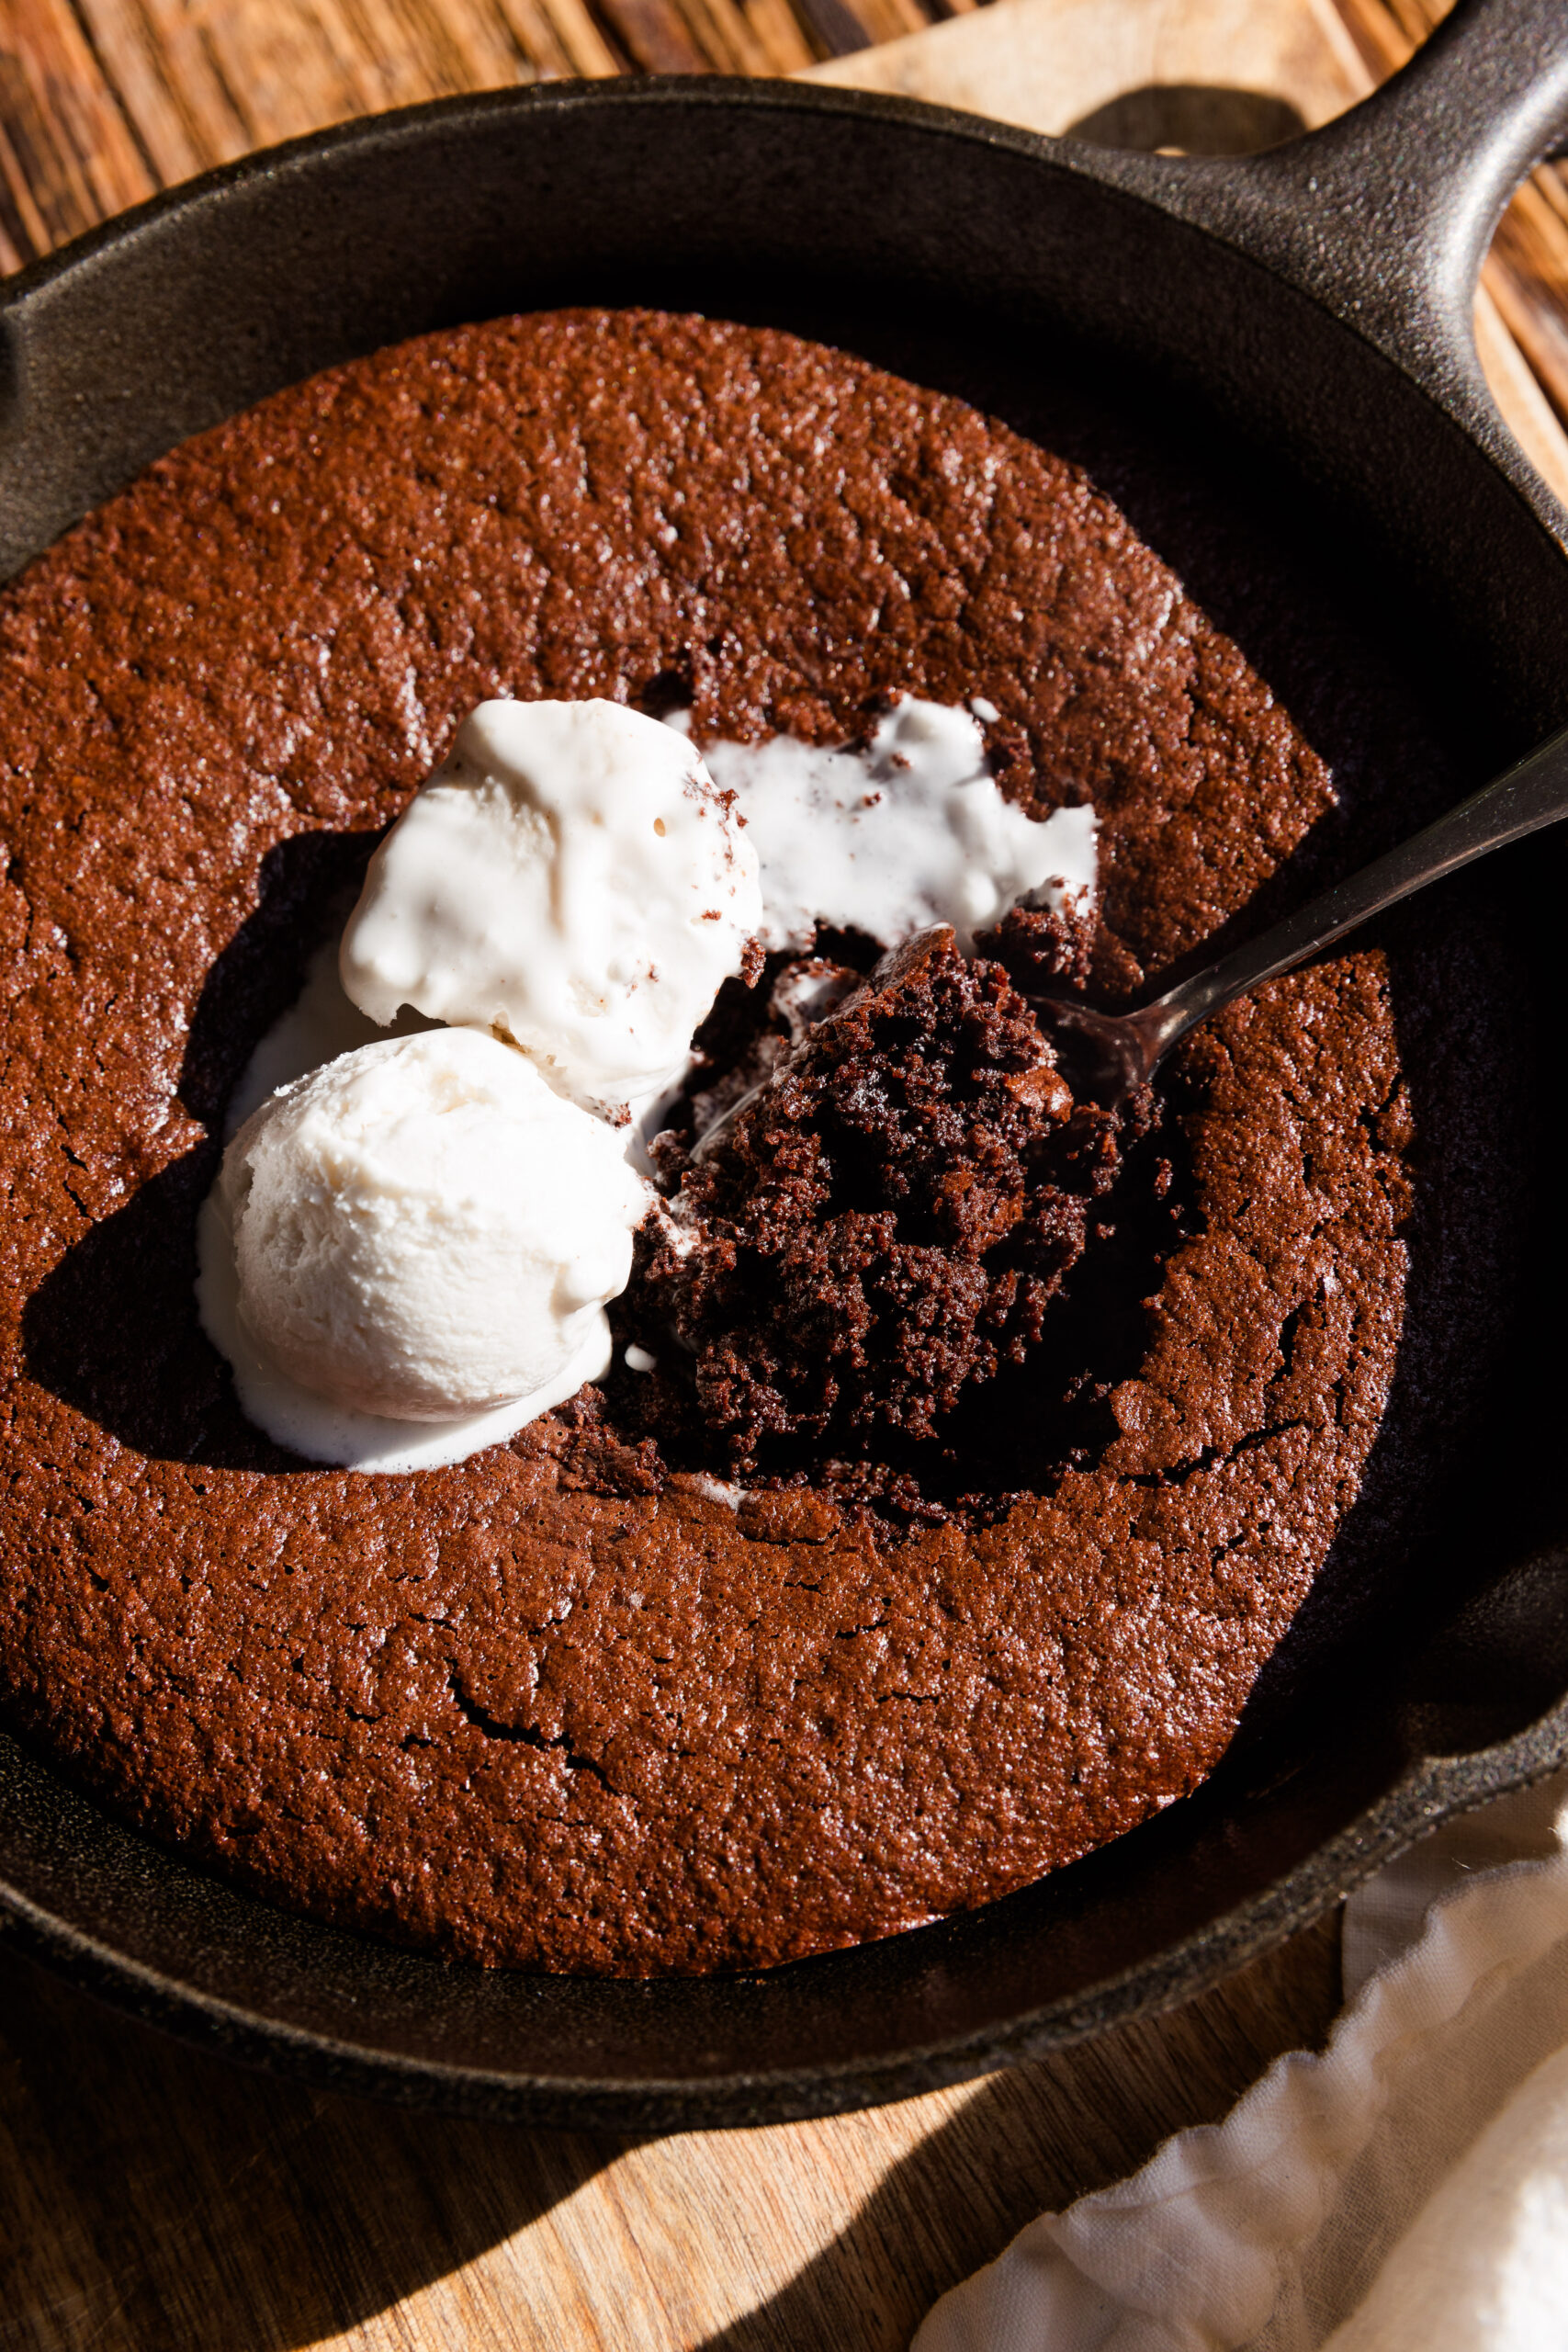
Step 8: Serving
Brownie skillets are best served hot! Top with dairy-free whipped cream or vanilla ice cream.
Expert Tips
- Make sure the coconut oil is measured first and then melted.
- After you melt the coconut oil and chocolate chips, make sure the mixture has time to cool before adding it to the egg mixture.
- For a soft and gooey underbaked center bake for 13-14 minutes.
- When measuring the almond flour, shake the bag first to loosen up the flour. Scoop with the measuring cup and use a butterknife to scrape off excess. Do NOT pack the flour.
Brownie Skillet Topping Ideas
It's best to serve this brownie skillet right out of the oven when it's still hot and gooey in the center.
Top with a cold scoop of Dairy-Free Vanilla Ice Cream or Coconut Whipped Cream!
You can also add fresh strawberries slices, raspberries, bananas, or even a drizzle of chocolate.
It's the perfect size for sharing with friends, family, or your significant other.
How to Store and Reheat Leftovers
If you have any leftovers, I recommend putting a cover over the skillet. (Reusable or plastic.)
It can be stored at room temperature for a couple days, but I recommend refrigerating so they stay fresh for longer!
If you added coconut whipped cream or vanilla ice cream on top, it needs to be refrigerated. The brownie skillet will store well in the refrigerator for 3-4 days.
To reheat, just pop the skillet back into the oven at 325 degrees for 3-5 minutes. You can also slice and reheat a single serving in the microwave.


After you make this Gluten Free Brownie Skillet, make sure to leave a comment & rate the recipe below!
Recipe Card
Healthy Gluten-Free Brownie Skillet
Equipment
- 1 8" Cast Iron Skillet
Ingredients
Wet Ingredients
- ½ Cup Dark Chocolate Chips If you prefer sweeter brownies, you can use milk chocolate.
- 2 Room Temperature Eggs
- ⅓ Cup Coconut Sugar Any granulated sugar will work.
- 2 Tablespoons Coconut Oil, Melted
- 1 Teaspoon Vanilla Extract You can swap for vanilla paste.
Dry Ingredients
- ⅓ Cup Almond Flour
- 2 Tablespoons Cacao Powder
- ¼ Teaspoon Baking Soda
- ¼ Teaspoon Salt
Instructions
Brownie Batter
- Start by adding almond flour, cacao powder, baking soda, and salt into a small mixing bowl. Use a whisk or fork to blend until fully combined.
- Add the chocolate chips with coconut oil into a small bowl and heat in the microwave in 15-20 second increments. (Stir well in between heating.)
- Next, add eggs and coconut sugar into a separate mixing bowl. Whip with a hand mixer for 2-3 minutes.
- Once the chocolate mixture has cooled a bit, pour into the whipped egg mixture. Make sure to use a spatula to scrape out all of the chocolate. Mix together with a whisk or hand mixer.
- Finally, pour the dry ingredients into the wet ingredients. Use a hand mixer or spatula to combine.
Baking
- Add the brownie batter into your greased 8" cast iron skillet. Use the back of a spoon or spatula to spread it out evenly.
- Bake at 350 degrees for 14-15 minutes. The less you bake the softer the center will be!
- Brownie skillets are best served hot! Top with dairy-free whipped cream or vanilla ice cream.
Notes
Expert Tips
- Make sure the coconut oil is measured first and then melted.
- After you melt the coconut oil and chocolate chips, make sure the mixture has time to cool before adding it to the egg mixture.
- For a soft and gooey underbaked center bake for 13-14 minutes.
- When measuring the almond flour, shake the bag first to loosen up the flour. Scoop with the measuring cup and use a butterknife to scrape off excess. Do NOT pack the flour.
Nutrition
Want more recipes?
Check out my recipe box where you can browse by season, diet, and flavor!
Mel
Can’t wait to try this recipe on Valentine’s Day! It looks amazing.
[email protected]
Thank you so much! Enjoy!
Ryan
We absolutely loved this recipe! So fudgy!