These Chocolate Dipped Ice Cream Bars instantly became a family favorite! The center is a simple dairy-free vanilla ice cream that's cut into squares and dipped in dark chocolate! Everything you know and love about Klondike Bars, but made with minimal ingredients, and lower in sugar!

Disclaimer: Some of the links in this post are affiliate links, which means I make a small commission if you choose to purchase through qualifying links.
Jump to:
🍴Ingredient Notes
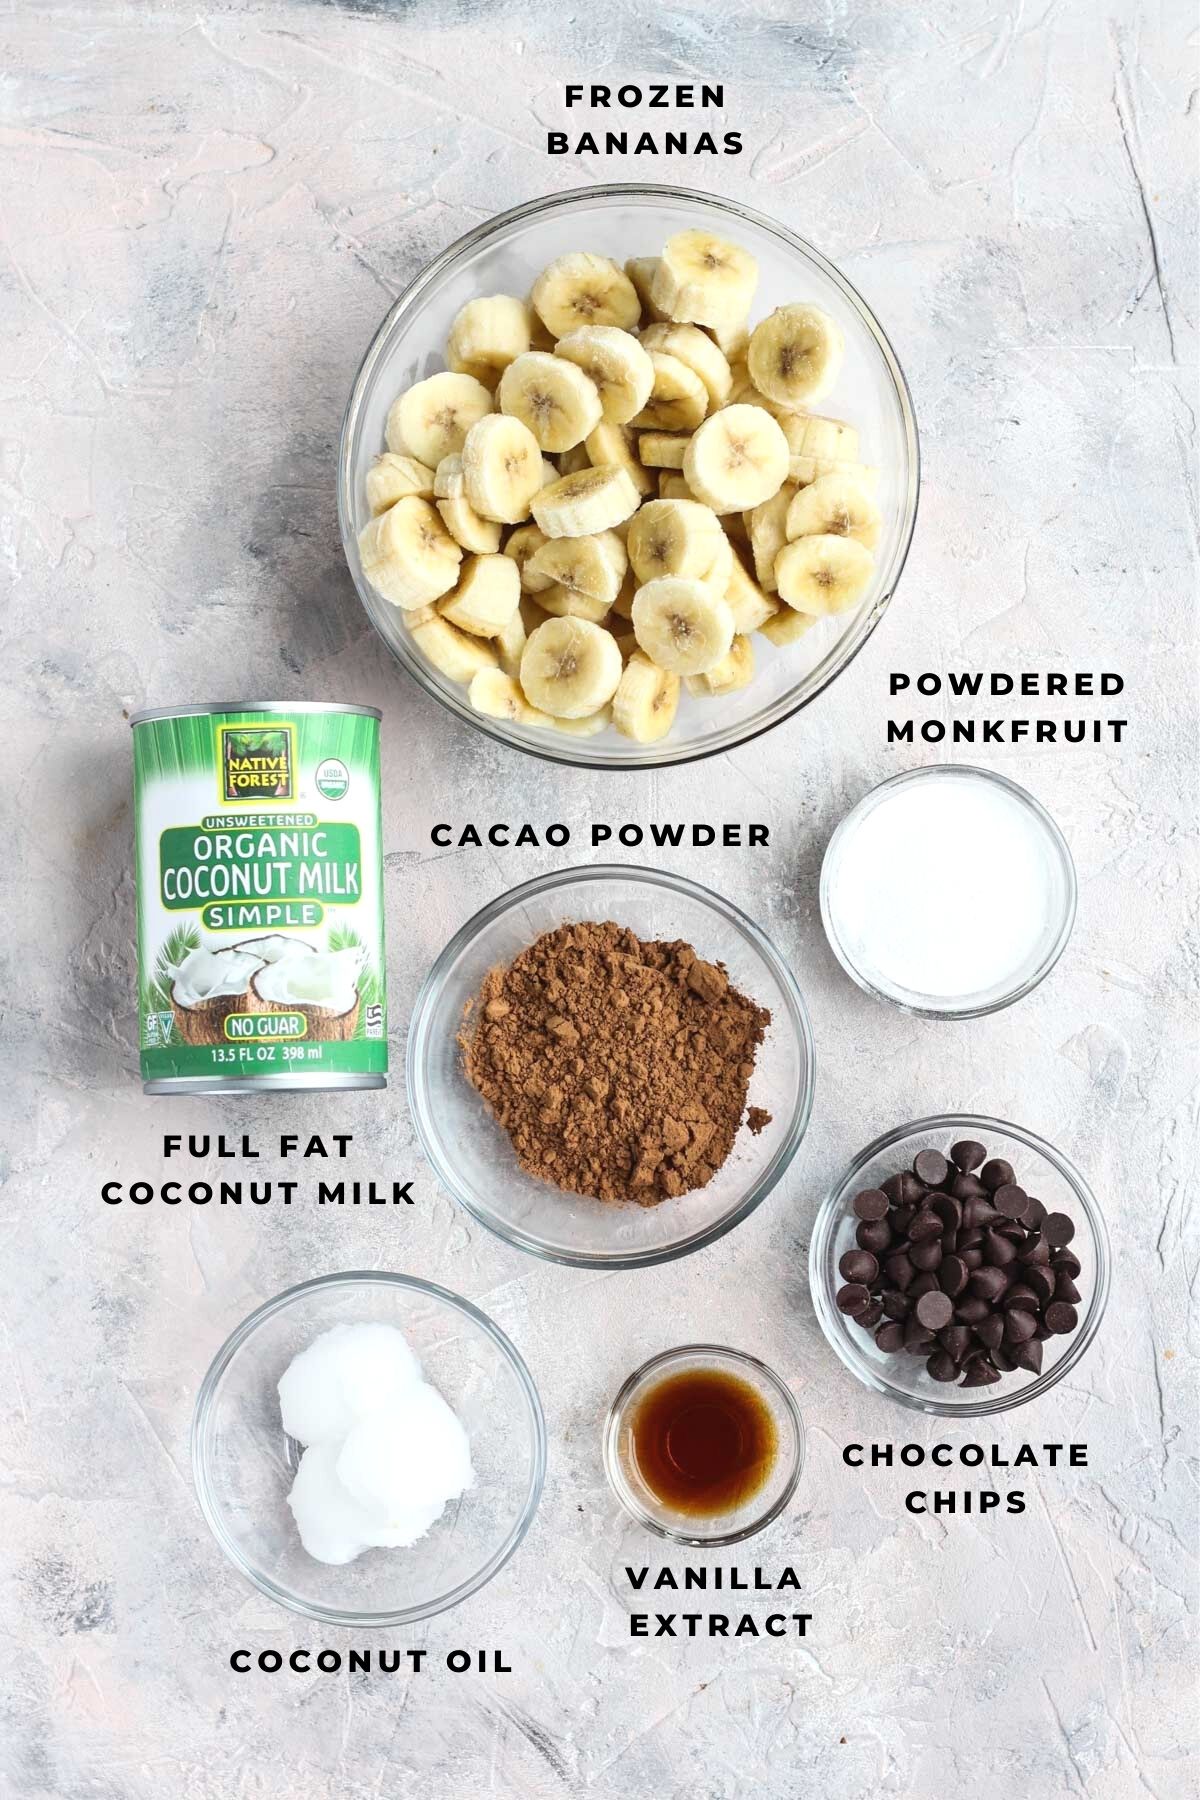
- Frozen Sliced Bananas - Unripe green bananas work best because they have less of a banana flavor. I like to cut the banana into small slices before I freeze them so they blend easier! The riper the banana, the sweeter they will be!
- Full Fat Coconut Milk - You'll need the thick part at the top. If you're having trouble blending the mixture, you can always add a little liquid from the bottom of the can!
- Vanilla Extract - This adds a nice flavor to the ice cream, and I don't reccomend skipping this step!
- Dark Chocolate Chips - Since I’m dairy-free I like to use vegan chocolate chips. I personally love the brand Pascha – they make high quality chocolate that’s dairy-free and soy-free. The 85% dark chips are my favorite because they’re sweet but not too sweet! They also have a 100% cacao option that is great for anyone who is sugar free.
- Coconut Oil - The coconut oil helps to thin out the chocolate mixture so it's easy to dip!
- Cacao Powder - You can use traditional cocoa powder, but I like cacao powder because it’s less processed and more NUTRIENT DENSE. TerraSoul is one of my favorite brands – great quality, and great price!
- Powdered Monkfruit Sugar - Since the cacao powder adds bitterness, you will need a sweetener to balance it out. I like using the Lakanto powdered sugar for a sugar-free option, but maple syrup or honey will work too! I do not reccomend granulated sugar because doesn't melt as easily into the chocolate mixture.
🍴Step by Step Instructions
Making the Ice Cream Filling
- Start by adding the thick part of the coconut milk, frozen bananas, and vanilla extract into your high speed blender.
- Blend on a low speed. Stir every few seconds until it starts blending smoothly. It takes a few minutes to get it going! You can add some of the liquid from the coconut milk can if you're having trouble with blending.


Freezing
- Once the ice cream looks smooth and creamy, pour it into your parchment paper lined dish. Use a spatula or the back of a spoon to spread it out.
- Freeze the mixture for about 2 hours or until the ice cream feels firm.


Making the Ice Cream Bars
- Once the mixture is frozen, remove the dish from the freezer and place it on the counter for a few minutes to defrost.
- Use the parchment paper to pull it out, and carefully transfer the ice cream to a parchment paper lined baking sheet. If you have trouble removing it, slide a knife along the edges to loosen it up.
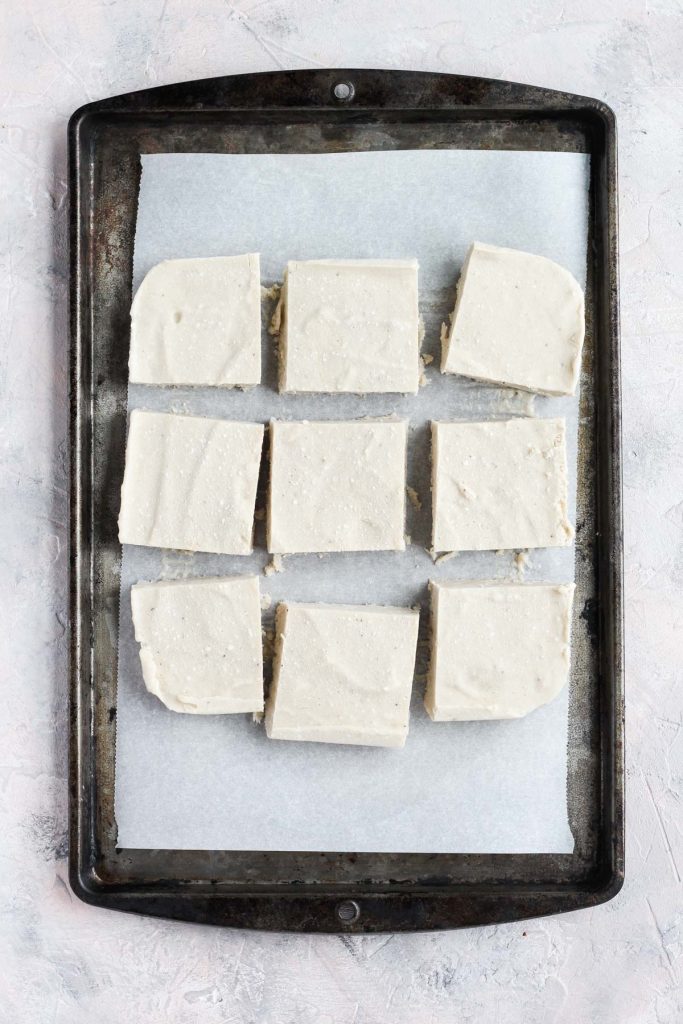
- Next, cut the ice cream into 9 squares. Spread them out on the baking sheet, and place them in the freezer while you prepare the chocolate.

Dipping in Chocolate
- Melt the chocolate chips and coconut oil in the microwave. Remove it every 20-30 seconds to stir until it's smooth.
- Next, add in the cacao powder and sweetener of choice. (If you'd like some!) Lakanto powdered sugar or maple syrup will work.
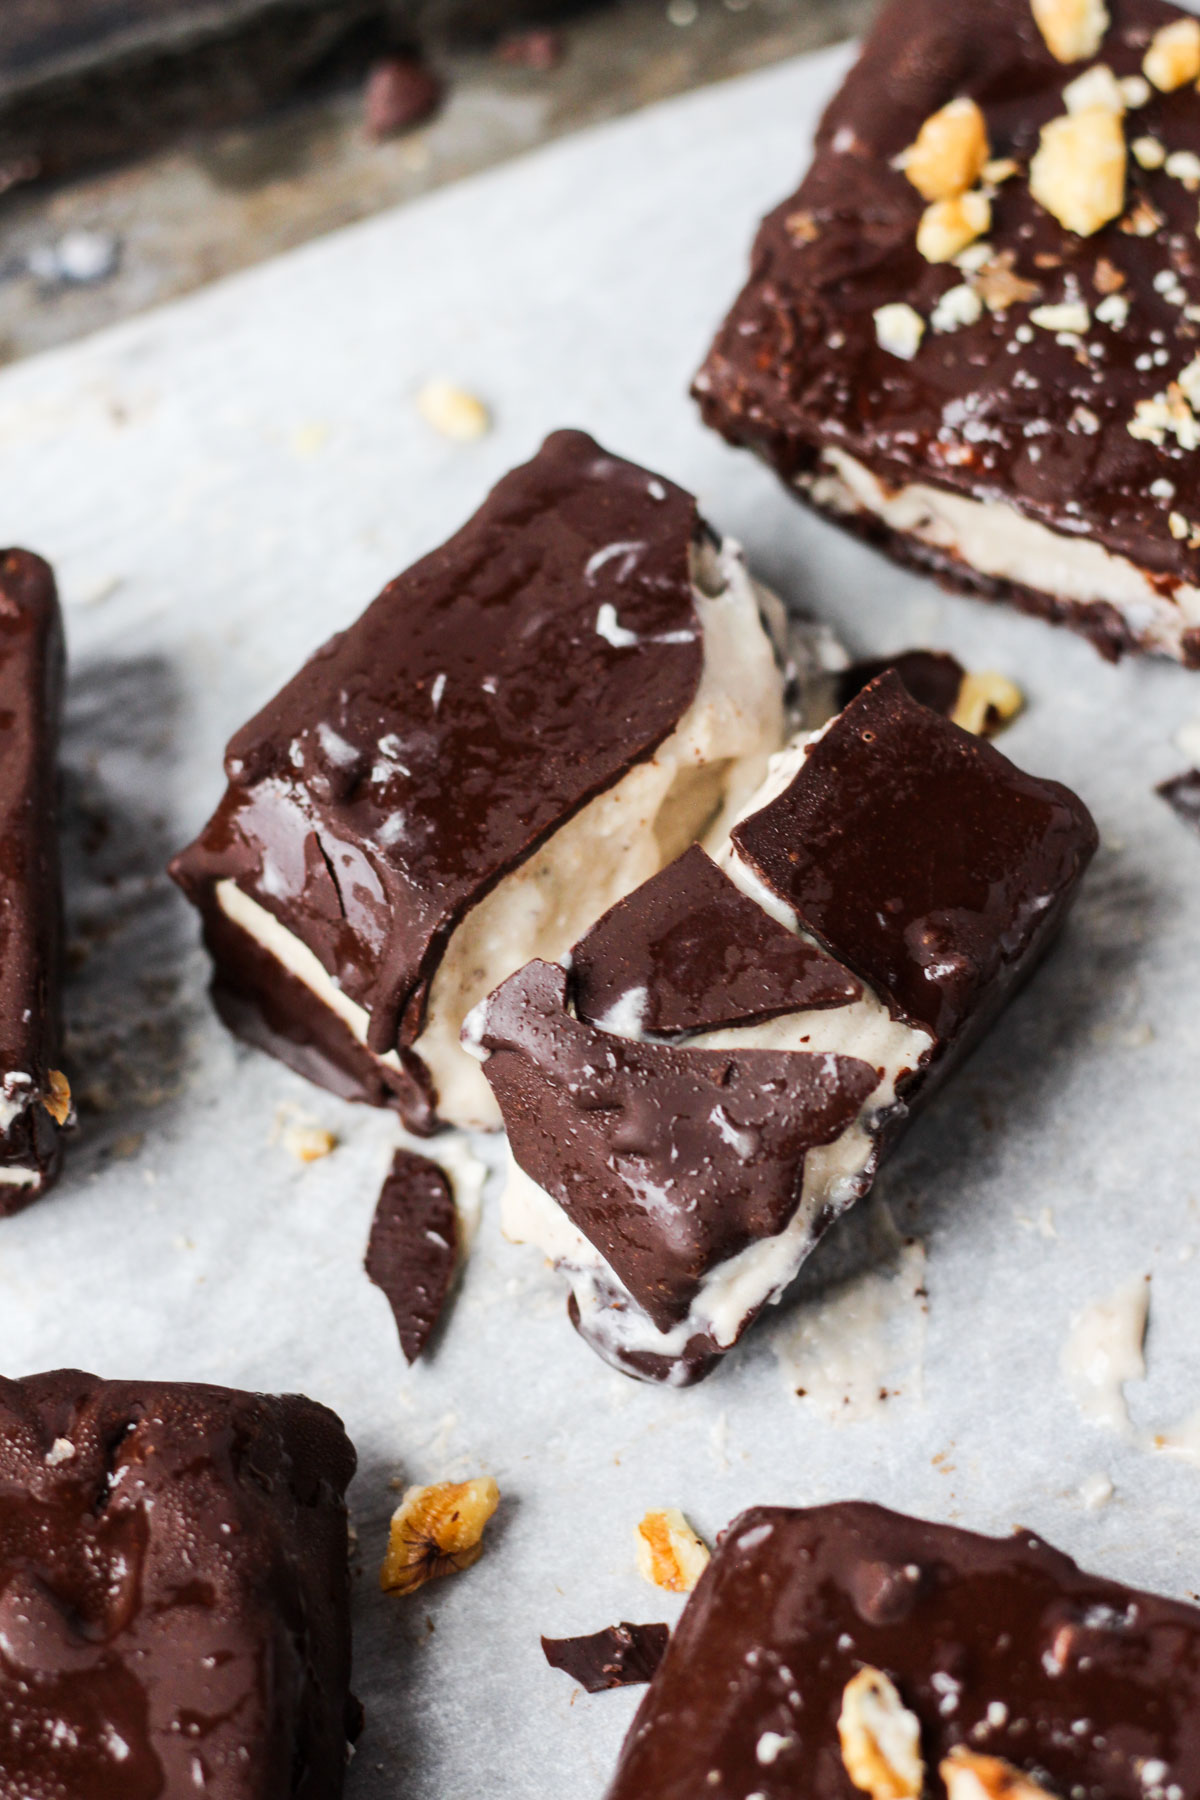
- Then remove the ice cream bars from the freezer and dip them into the chocolate using two forks. Let the excess chocolate drip off before adding them back to the parchment paper lined baking sheet.
- After they're coated with chocolate, place them back into the freezer to set for a few minutes. Enjoy!

Expert Tips
- When melting the chocolate, add the chocolate chips and coconut oil into a medium sized bowl. Microwave for about 20 seconds, remove the bowl, stir, and place back in the microwave. Repeat until it's smooth and creamy.
- If you don't have cacao powder, you can skip that altogether and just chocolate chips. I would still reccomend using a tablespoon of coconut oil to help thin out the chocolate.
- Make sure the chocolate bowl is wide enough to fit in the ice cream bars.
- The ice cream bars are delicious as is, but if you'd like to sprinkle on chopped nuts or shredded coconut, make sure to do it right after you dip the bar! The chocolate freezes quickly.
- For a thicker chocolate coating, double dip the bars, or drizzle chocolate on top!
- Use two forks to dip the ice cream bars into the melted chocolate. It allows the excess chocolate to dip off the edges.
- Line the glass baking dish with parchment paper so it's easy to pull the frozen ice cream out of the dish. After it has sat out for a few minutes, you should be able to pull it out easily in once piece.
- If you want smaller serving sizes for kids, you can cut the ice cream bars into smaller shapes before dipping them into the chocolate!
How to store leftovers
After the ice cream bars have set on the parchment paper, you can transfer leftovers to a freezer safe container with a cover. After they've been frozen for a while, I recommend letting them sit out on the counter for 10-15 minutes before you enjoy!
More ice cream recipes!
After you make these Chocolate Dipped Ice Cream Bars, make sure to leave a comment & rate the recipe!
Recipe
Chocolate Dipped Ice Cream Bars (Vegan)
Equipment
- 8x8 Glass Dish
- Baking Sheet
Ingredients
Ice Cream Filling
- 3 Cups Frozen Sliced Bananas Unripe green bananas work best!
- 13.5 Ounces Full Fat Coconut Milk You'll need the thick part at the top.
- 1-2 Teaspoons Vanilla Extract
Chocolate Coating
- ⅓ Cup Dark Chocolate Chips I used Pascha vegan 85% dark chocolate chips.
- 3 Tablespoons Coconut Oil
- ¼ Cup Cacao Powder
- 1 Tablespoon Powdered Monkfruit Sugar You can use powdered sugar or maple syrup.
Instructions
Making the Ice Cream Filling
- Start by adding the thick part of the coconut milk, frozen bananas, and vanilla extract into your high speed blender.
- Blend on a low speed. Stir every few seconds until it starts blending smoothly. It takes a few minutes to get it going! You can add some of the liquid from the coconut milk can if you're having trouble with blending.
Freezing
- Once the ice cream looks smooth and creamy, pour it into your parchment paper lined dish. Use a spatula or the back of a spoon to spread it out.
- Freeze the mixture for about 2 hours or until the ice cream feels firm.
Making the Ice Cream Bars
- Once the mixture is frozen, remove the dish from the freezer and place it on the counter for a few minutes to defrost.
- Use the parchment paper to pull it out, and carefully transfer the ice cream to a parchment paper lined baking sheet. If you have trouble removing it, slide a knife along the edges to loosen it up.
- Next, cut the ice cream into 9 squares. Spread them out on the baking sheet, and place them in the freezer while you prepare the chocolate.
Putting it all together
- Melt the chocolate chips and coconut oil in the microwave. Remove it every 20-30 seconds to stir until it's smooth.
- Next, add in the cacao powder and sweetener of choice. (If you'd like some!) Lakanto powdered sugar or maple syrup will work.
- Then remove the ice cream bars from the freezer and dip them into the chocolate using two forks. Let the excess chocolate drip off before adding them back to the parchment paper lined baking sheet.
- After they're coated with chocolate, place them back into the freezer to set for a few minutes. Enjoy!
Notes
Expert Tips
- When melting the chocolate, add the chocolate chips and coconut oil into a medium sized bowl. Microwave for about 20 seconds, remove the bowl, stir, and place back in the microwave. Repeat until it's smooth and creamy.
- If you don't have cacao powder, you can skip that altogether and just chocolate chips. I would still reccomend using a tablespoon of coconut oil to help thin out the chocolate.
- Make sure the chocolate bowl is wide enough to fit in the ice cream bars.
- The ice cream bars are delicious as is, but if you'd like to sprinkle on chopped nuts or shredded coconut, make sure to do it right after you dip the bar! The chocolate freezes quickly.
- For a thicker chocolate coating, double dip the bars, or drizzle chocolate on top!
- Use two forks to dip the ice cream bars into the melted chocolate. It allows the excess chocolate to dip off the edges.
- Line the glass baking dish with parchment paper so it's easy to pull the frozen ice cream out of the dish. After it has sat out for a few minutes, you should be able to pull it out easily in once piece.
- If you want smaller serving sizes for kids, you can cut the ice cream bars into smaller shapes before dipping them into the chocolate!
How to store leftovers
After the ice cream bars have set on the parchment paper, you can transfer leftovers to a freezer safe container with a cover. After they've been frozen for a while, I recommend letting them sit out on the counter for 10-15 minutes before you enjoy!Nutrition
Shop this recipe -
 Buy Now →
  Buy Now →
  Buy Now →
  Buy Now →
  Buy Now →
 Want more recipes?
Check out my recipe box where you can browse by season, diet, and flavor!


Comments
No Comments