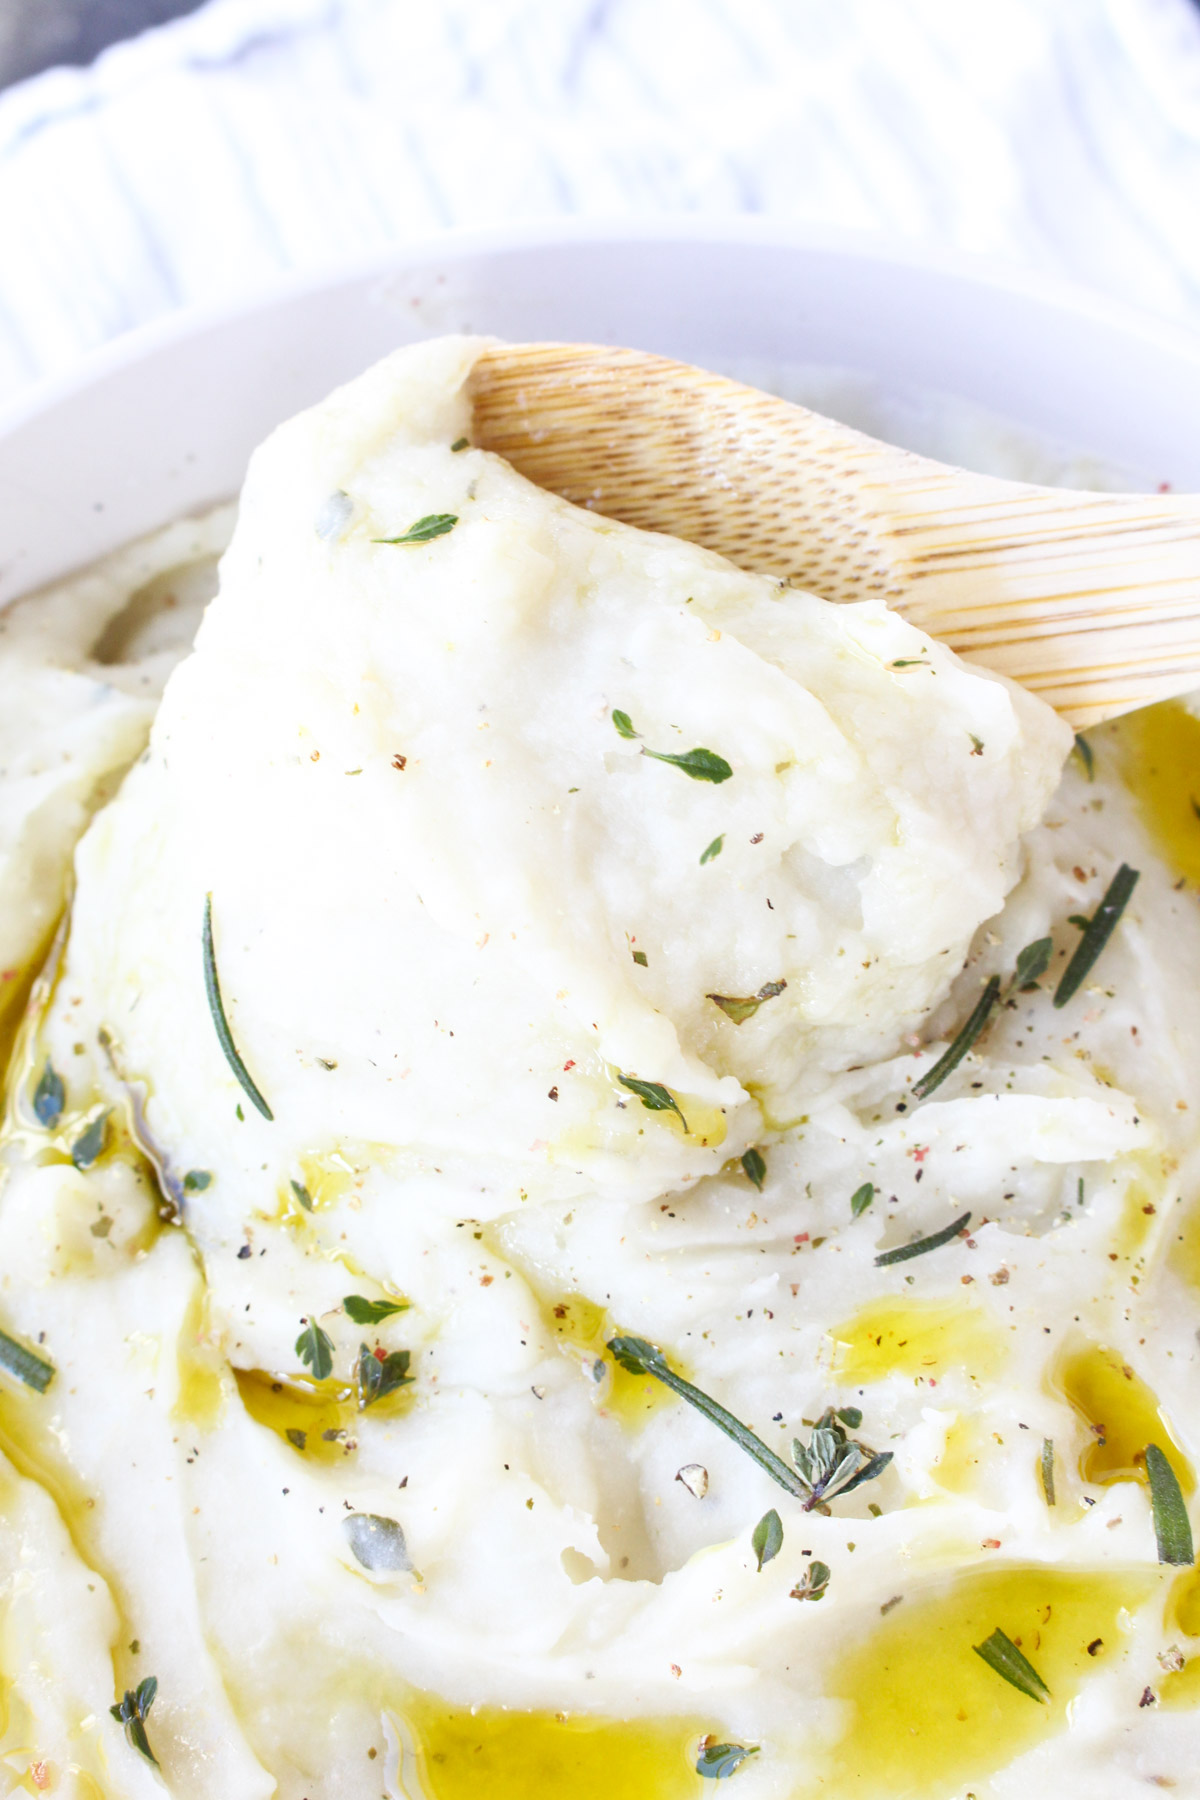
These are the BEST Dairy Free Mashed Potatoes you will ever try! The creamy texture comes from full fat coconut milk, and my secret ingredient - CAULIFLOWER. You would honestly never know that there's cauliflower in the mix, but since it has a thinner consistency than potatoes, it adds a nice creamy texture. I seasoned them with fresh thyme, rosemary, roasted garlic, salt and pepper! This recipe is simple, easy to make, and only takes 12 minutes in the pressure cooker!
Disclaimer: Some of the links in this post are affiliate links, which means I make a small commission if you choose to purchase through qualifying links.
Jump to:
🍴Ingredient Notes
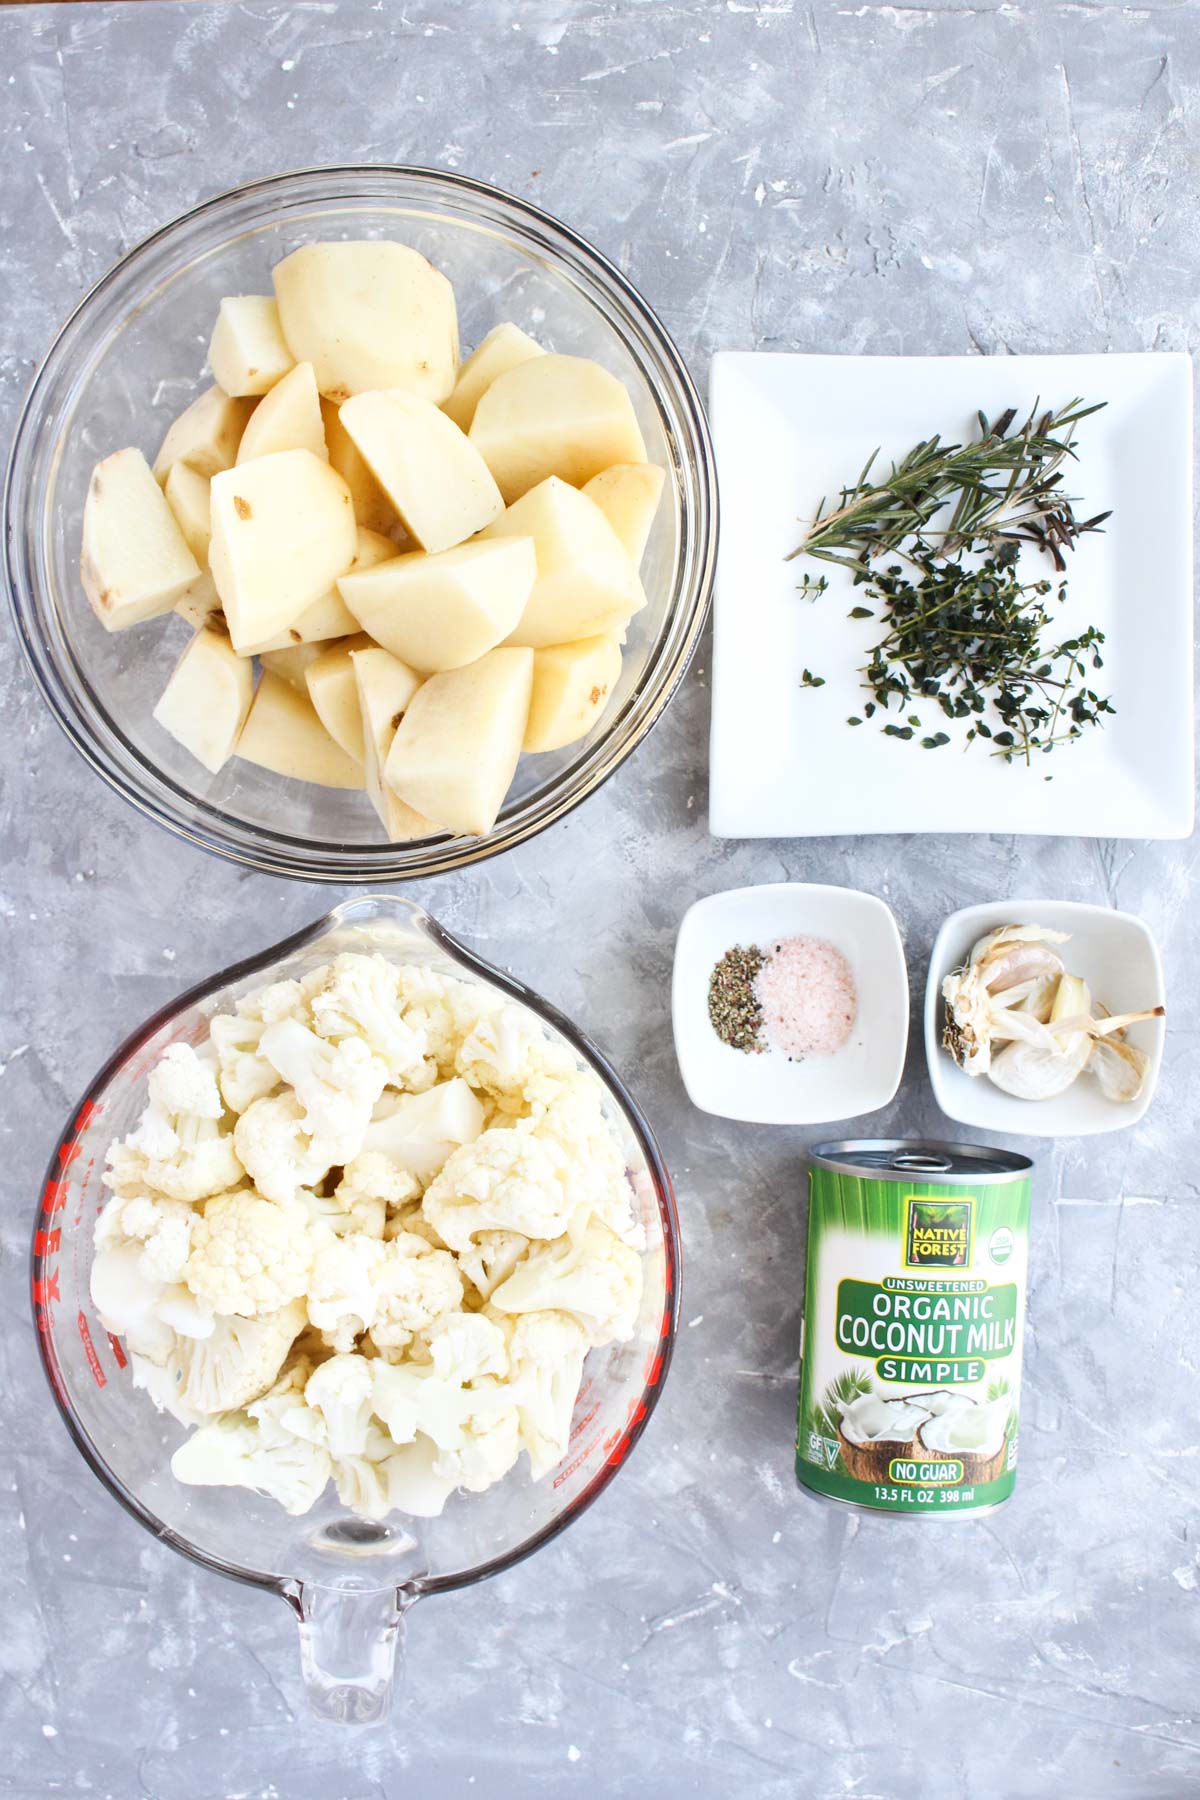
- Russet Potatoes, Roughly Chopped - You can also use Yukon Gold Potatoes.
- Cauliflower, Roughly Chopped
- Full Fat Coconut Milk - You can also use regular unsweetened coconut milk, but you might need a little extra to make it creamier. You can also add a little ghee or olive oil!
- Roasted Garlic - You can sub for garlic powder, but the flavor of roasted garlic is a delicious addition!
- Fresh Rosemary - You can also use dried rosemary. (About ½ teaspoon.)
- Fresh Thyme - You can also use dried thyme. (About ½ teaspoon.)
🍴Step by Step Instructions
Roasting the garlic
- If you plan to roast your garlic, you'll want to do that first. Bake your garlic cloves at 400 degrees in a small pan or loosely on aluminum foil. You'll know they're ready when they become fragrant. The skin will also turn a light golden brown. It takes about 30 minutes.
Preparing the vegetables
- Start by roughly chopping your cauliflower into small chunks. (They don't have to be perfect.) Measure out about 8 cups, and add them to your pressure cooker.
- Next, peel and chop your potatoes into smaller chunks. Measure out about 10 cups, and add them to the pressure cooker.
- Then add your coconut milk, salt, pepper, thyme rosemary, and roasted garlic. If your garlic isn't done yet, you can blend it in at the end! Give the mixture a good stir, and place the cover on top.
Cooking
- Make sure your cover is set to seal/lock! Then turn the pressure cooker on high for 15 minutes.
- Once it's done, slowly release the pressure and remove the cover. Stir the mixture around a few times, and let it sit for a few minutes.
Mashing
- It's time to mash! Add your roasted garlic to the potato mixture, and use a hand masher or immersion blender to mix until you reach your desired consistency. I like using the immersion blender because they come out super creamy!
Stovetop Instructions
As much as I love my pressure cooker, I know not everyone has one. I tested them on the stovetop, and they still come out creamy and delicious! The recipe just takes a little longer to cook. (About 30 minutes.)
- If you plan to roast garlic, add your cloves to a small baking pan or loosely wrap them in aluminum foil. Bake at 400 degrees until they become fragrant. (About 30 minutes.) The skin will turn a light golden brown.
- Start with a large sauce pan, and add your coconut milk. Turn the burner to medium heat, and place the cover on top.
- Next, roughly chop your cauliflower. Add the cauliflower to the coconut milk and cover the pot.
- Roughly chop your peeled potatoes, add them to the pot and place the cover back on top.
- Next, add the salt, black pepper, thyme, and rosemary. If you didn't roast your garlic yet, don't worry about adding that in now. If you plan to use garlic powder, add that in with the rest of the seasoning.
- Stir everything together, and turn the heat to medium low. Let the mixture simmer for 30 minutes. After 30 minutes, remove the cover and check to see if the potatoes are tender. (Stick a fork in.) If they're done, turn the heat off and stir everything around a few times.
- I love using an immersion blender to mash my potatoes, but if you don't have one, you can certainly hand mash them! (Using a potato masher.) While mashing, add in your roasted garlic, and any extra salt - if necessary.
Mashed Potato Tips
Seasoning
Feel free to add more or less herbs depending on what you like! I always go a little heavier on the rosemary because I love the way it tastes. After you mash your potato mixture, you might need to add more salt. Stir in a little more and taste test before serving.
Milk
I used full fat coconut milk in the can because it add a nice creamy texture, but you can always use regular coconut milk! You might need to use more than what the recipe calls for to make sure they're nice and creamy! If you find they're still a little dry, add some olive oil or ghee.
Topping
I like to top mine with extra fresh herbs, and a little olive oil!

Frequently Asked Questions
I love using Russet Potatoes for this recipe, but Yukon Gold is another great choice! Both have a creamy consistency when you mash them.
You can use any milk alternative that you have on hand! Full fat coconut milk is extra creamy and thick, so when using regular milk you might need to add olive oil or ghee to make them super creamy!
Yes, of course! I prefer fresh roasted garlic cloves because the flavor is richer, but garlic powder would work too. I would use about ½-1 teaspoon. (Depending on how much you like.)
I prefer peeling my potatoes, but you can rinse them thoroughly and keep the skin on! It depends on what you like!
I have not tested this recipe in a slow cooker, but I would imagine it would work! Cook on low for about 6-8 hours. (Or until tender.) Let me know if you try!
How to store and reheat leftovers
Store leftover mashed potatoes in an air tight glass container in the refrigerator for about 5 days. To reheat you can microwave them, or add them to a sauce pan with some extra coconut milk. Stir until they're warm! You can also store leftovers in the freezer for a couple of months! Make sure they're in a freezer safe glass container. I personally love the Ello Glass Containers. (They're freezer, oven, and microwave safe.)
More side dish recipes!
- Easy Roasted Pesto Potatoes
- Crispy Sweet Potato Tots
- Butternut Squash Risotto (Dairy-Free)
- Easy Roasted Fall Vegetables
- Creamy Vegetable Risotto
After you make these Garlic Herb Mashed Potatoes, make sure to leave a comment & rate the recipe! Your feedback is helpful for me, and for anyone planning to try this recipe. I hope you love them as much as I do!
Recipe
Dairy Free Mashed Potatoes
Equipment
- Pressure cooker
- Immersion Blender or Potato Masher
Ingredients
- 10 Cups Russet Potatoes, Roughly Chopped You can also use Yukon Gold Potatoes.
- 8 Cups Cauliflower, Roughly Chopped
- 1 Can Full Fat Coconut Milk You can also use regular unsweetened coconut milk.
- 4-6 Cloves of Roasted Garlic
Seasoning
- 1 Tablespoon Fresh Rosemary
- 1 Tablespoon Fresh Thyme
- 1 Teaspoon Salt
- ½ Teaspoon Black Pepper
Instructions
Roasting the garlic
- If you plan to roast your garlic, you'll want to do that first. Bake your garlic cloves at 400 degrees in a small pan or loosely on aluminum foil. You'll know they're ready when they become fragrant. The skin will also turn a light golden brown. It takes about 30-40 minutes.
Preparing the vegetables
- Start by roughly chopping your cauliflower into small chunks. (They don't have to be perfect.) Measure out about 8 cups, and add them to your pressure cooker.
- Next, peel and chop your potatoes into smaller chunks. Measure out about 10 cups, and add them to the pressure cooker.
Adding the seasoning and coconut milk
- Then add your coconut milk, salt, pepper, thyme rosemary, and roasted garlic. If your garlic isn't done yet, you can blend it in at the end! Give the mixture a good stir, and place the cover on top.
Cooking
- Make sure your cover is set to seal/lock! Then turn the pressure cooker on high for 15 minutes.
- Once it's done, slowly release the pressure and remove the cover. Stir the mixture around a few times, and let it sit for a few minutes.
Mashing
- It's time to mash! Add your roasted garlic to the potato mixture, and use a hand masher or immersion blender to mix until you reach your desired consistency. I like using the immersion blender because they come out super creamy!
Notes
Mashed Potato Tips
Seasoning - Feel free to add more or less herbs depending on what you like! I always go a little heavier on the rosemary because I love the way it tastes. After you mash your potato mixture, you might need to add more salt. Stir in a little more and taste test before serving. Milk - I used full fat coconut milk in the can because it add a nice creamy texture, but you can always use regular coconut milk! You might need to use more than what the recipe calls for to make sure they're nice and creamy! If you find they're still a little dry, add some olive oil or ghee. Topping - I like to top mine with extra fresh herbs, and a little olive oil!Stovetop Instructions
As much as I love my pressure cooker, I know not everyone has one. I tested them on the stovetop, and they still come out creamy and delicious! The recipe just takes a little longer to cook. (About 30 minutes.)- If you plan to roast garlic, add your cloves to a small baking pan or loosely wrap them in aluminum foil. Bake at 400 degrees until they become fragrant. (About 30 minutes.) The skin will turn a light golden brown.
- Start with a large sauce pan, and add your coconut milk. Turn the burner to medium heat, and place the cover on top.
- Next, roughly chop your cauliflower. Add the cauliflower to the coconut milk and cover the pot.
- Roughly chop your peeled potatoes, add them to the pot and place the cover back on top.
- Next, add the salt, black pepper, thyme, and rosemary. If you didn't roast your garlic yet, don't worry about adding that in now. If you plan to use garlic powder, add that in with the rest of the seasoning.
- Stir everything together, and turn the heat to medium low. Let the mixture simmer for 30 minutes. After 30 minutes, remove the cover and check to see if the potatoes are tender. (Stick a fork in.) If they're done, turn the heat off and stir everything around a few times.
- I love using an immersion blender to mash my potatoes, but if you don't have one, you can certainly hand mash them! (Using a potato masher.) While mashing, add in your roasted garlic, and any extra salt - if necessary.
Frequently Asked Questions
Nutrition
Shop this recipe -
 Buy Now →
  Buy Now →
  Buy Now →
  Buy Now →
  Buy Now →
  Buy Now →
 Want more recipes?
Check out my recipe box where you can browse by season, diet, and flavor!



Leave a Reply